Showing posts with label Christmas. Show all posts

Monday, December 23, 2013

"Stained-glass" Nativity


At church I am currently serving in the Nursery class for the children 18 months through 3 years old.  I wanted to do a little something different from our typical coloring this week since it's Christmas and I wanted it to be Christ-centered.


What I came up with was an easy craft--simple enough for the little ones but interesting enough that my 9-year-old was excited to make one with my extras after church.

I first searched the Silhouette store for a simple nativity--I didn't want to spend a ton of time picking out all the little pieces to prep everything.  I then sized the silhouette so that I could fit 2 to a page.  After cutting the pieces from cardstock I laid them out on contact paper.  Since I didn't want anything stuck to them quite yet I replaced the backing on top of the contact paper.  On Sunday it was so simple to pass one out to every child and pull the backing off.  

I placed some cut up pieces of tissue paper in front of the kids and I instructed them to cover all of the "sticky parts" with paper.  Once they were done I put another piece of contact paper on the back and trimmed the edges.


They all turned out uniquely beautiful and each of the children had something to take home to remind them the real reason for the season.


Monday, December 16, 2013

Christmas Books


I have discovered some Christmas books this year that I am just loving.  Just in case you haven't discovered them for yourself I thought I would share!


Christmas Day in the Morning by Pearl S. Buck


I grew up watching The Gift but never realized that it was based on this story written by Pearl S. Buck. It's about a young boy who wants to get his father something really special for Christmas.  He has no money to spend but ends up giving the best Christmas gift of all.


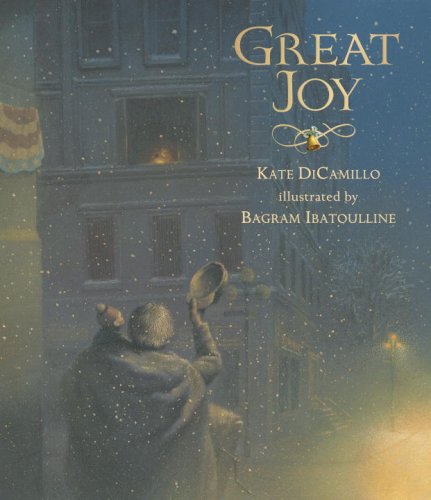
Great Joy by Kate DiCamillo


A story about an organ grinder and his monkey--and the kindness they receive from a little girl.


Helping Santa by Bert Dodson 
 

Told by his older sister that there is no Santa, a little boy rushes off to his grandma's house.  In a way that only a grandma can she brushes the accusation aside and helps the boy to become one of Santa's helpers.


Christmas Oranges by Linda Bethers


A touching story of a little orphan girl and the act of kindness she received.


The Mansion by Henry Van Dyke


John is a man who wanted the best of everything.  One evening he has a dream and learns what it means to give unselfishly.


And one of my favorites:

Mortimer's Christmas Manger by Karma Wilson


The story of a little mouse who finds a new house and discovers the true meaning of Christmas.


What are your favorite Christmas books?


Wednesday, December 11, 2013

Gifts Kids Can Make: Baking Soda Oranments


These homemade ornaments are a fun gift that kids can make or simply a fun craft to do with them any time of the year.  Last year my kids made some for their grandparents for a Christmas gift and this year I made them with my Activity Day Girls group at church.

I love the pure white look of the baking soda ornaments compared to the look of the salt dough ones.  These are so easy to make and worth giving a try.


To make the dough:

2 cups baking soda
1 cup corn starch
1 1/4 cups water

In a medium sized pot combine the cornstarch, baking soda, and water.  Stir mixture over medium heat.  After a few minutes the mixture will start to boil and thicken.  When it looks like smooth mashed potatoes remove dough from the heat and transfer to a bowl.  Cover dough with a damp cloth or paper towel until it's cool.  


Once cool, knead the dough on a smooth surface, adding a little more cornstarch if it feels sticky.  Roll out dough to 1/4 inch thick.  Cut out shapes using cookie cutters and transfer to a parchment lined cookie sheet to dry.  Use a thin straw to place a hole at the top of the ornament for hanging.  My kids love to decorate the ornaments with stamps and I love how pretty it looks.  Let ornaments dry on the tray overnight, turning over the next day to continue drying.  To dry ornaments faster bake them in a 175 degree oven for 1 hour, or until completely hard, turning over after 30 minutes.  Once dry the ornaments can be painted (I love how they look just being white though) and string a ribbon through for hanging.


Thursday, December 5, 2013

Christmas Ornament Wreath


This week I made an ornament wreath and I was so happy with how it turned out that I wanted to share it with you.


Several years ago I made a different ornament wreath by stringing ornaments onto a wire hanger bent into a circle.  I liked it but I didn't love it.  The ornaments were always popping off and it just seemed like a jumbled mess most of the time.  When I spotted Decor Chicks ornament wreath on Pinterest I instantly felt compelled to remake my wreath.  I had already been to the craft store earlier that day but I dragged my kids again the next day so I could pick up a base for my wreath and some ribbon.


I left the plastic wrapping on the wreath and then covered it in ribbon.


After taking off the silver tops from each ornament I began gluing them around the wreath with my hot glue gun.


I glued the tops facing down and also put a dab of glue between the ornaments where they touched to help make the wreath sturdier.


After making my way around the wreath once I added another layer of ornaments in front and behind the original one.


 After that I filled the the bare spots with smaller ornaments.  I think I used four different sizes of ornaments total.


This project took a lot longer that I thought it would but I still was able to get it done in an afternoon.  It also used quite a bit more ornaments than I thought but luckily I had enough to finish the project without having to make another run to the store.  I just love the pop of color it adds to our front door.


Tell me, what kind of wreath do you have hanging on your front door right now?


Friday, November 22, 2013

Simple Christmas Gift Ideas for Family, Friends, and Neighbors + Free Printable Tags


It's that time of year to go shopping!  I just love Christmas shopping!!!  I love picking out gifts or making gifts to give.  It's such a fun time of year.

Giving a meaningful and thoughtful gift doesn't have to be extravagant or cost a lot of money.  Below I've compiled several ideas for simple gifts that can be given to family, friends, and neighbors.


First, is a framed Christmas printable.  There are so many beautiful printable out there.  Print them off on your printer at home or send them to your favorite print shop.  Frames can sometimes be expensive but I've found beautiful frames at the dollar store on multiple occasions and Ikea has nice frames too that don't cost a lot of money.  Below are some of my favorite Christmas printables:


1. Oh Holy Night - AKA Design
2. And suddenly there was with the angel - Auntie Lolo Crafts
3. Fun unto us a child is born - Pea Bee Designs
4. Simply Christmas - Ladybird Ln
5. The best way to spread Christmas cheer - Becoming Martha
6. For unto us a child is born - Serving Pink Lemonade


What friend doesn't need a roll of wrapping paper at Christmas time???  I think this is a gift that everyone can use.  My favorite place to buy Christmas wrap is Hobby-Lobby.  They have so many pretty prints, it always seems to be 50% off, you get a ton of paper on the roll, and it's a thick quality paper.  Marshall's and Home Goods are two other places where I love to buy wrapping paper--great prices and beautiful prints to choose from.  Add one of the printable tags below to a roll of wrapping paper and you're good to go.
 

Tags inspired by Sara and Tami
(To print: Click on tag to enlarge.  Right click and copy.  Paste into a word document and print)


Here's another take on the wrapping paper idea.  This one includes tape.  Thanks Krista for the idea!


Who doesn't need an extra blanket once the weather turns cold?  It seems like we have a million but it's never enough.  I can't tell you how much I look forward to the spring each year and putting all those blankets away.  They seem to be everywhere.
For this gift make a homemade blanket or pick one up at the store.  Ikea has fleece blankets for only $4 a piece!  Bundle it with ribbon and add a cute tag to dress it up.  I've created three for you to choose from.


(To print: Click on tag to enlarge.  Right click and copy.  Paste into a word document and print)


Who isn't busy this time of year?  And who wouldn't like a night off from doing the dishes???  This gift is perfect for your ultra busy friends or that person who already has everything.  Tie together a set of paper plates, cups, napkins, and flatware, add a sweet tag and you'll have one happy friend.
Inspired by Shelley
(To print: Click on tag to enlarge.  Right click and copy.  Paste into a word document and print)


How about a lovely warm candle to brighten the cold dreary winter.  I love to burn beeswax candles in my home. (See this article to find out why I avoid paraffin candles.)  Tie around this little tag and you've got a simple warming gift.
(To print: Click on tag to enlarge.  Right click and copy.  Paste into a word document and print)


For your friends with small children a gingerbread house kit would bring so much fun.  I know my kids love making one each year.  Print off the label below to add to a gift bag.


Then fill the bag with graham crackers, frosting, and goodies to decorate with.
(To print: Click on tag to enlarge.  Right click and copy.  Paste into a word document and print)


Last but not least, hot chocolate!  We go through boxes and boxes of this stuff every winter.  Wrap a box up with a pretty bow and cute gift tag and I don't know who wouldn't enjoy an extra box of hot chocolate once the weather turns cold.
Find the printable tag over at Capital B.


What are your favorite simple gifts to give?


Wednesday, November 20, 2013

Dressing Up Papers Bag for Holiday Gift Giving


The holiday's are coming up--which means lots of gift wrapping!

Transforming a plain ol' paper lunch sack into a classy gift giving bag is simple.  These bags are perfect for delivering small gifts or holding holiday treats wrapped in parchment paper.


To print "Sweet Greetings" on this white sack I ran it through my printer using the image I found here.  Then, after folding over the top, I punched two small holes and tied a ribbon through them.  I love this simple and classy look.


To create this bag I folded over the top of the bag and placed a doilie (with one side cut off) over the fold.  I then added a simple gift tag on top.  To add the green stitched line I ran the bag through my sewing machine.


This sack is one of my favorites.  After folding the top over I traced a scalloped edge onto the end of the bag and cut along the lines.  Using a single hole punch I placed holes along the scalloped edge.  I love how it gives off the look of eyelet fabric.  I then strung some bakers twine around the bag a few times and added a simple Merry Christmas gift tag.
 
I think this same idea would make for some beautiful mother's day wrapping using a white bag and pink ribbon.  There are so many possibilities.

Use the scalloped edge below to help you create the same look.  Click on picture below to enlarge.  Then copy and paste into a word document.  Adjust the size to fit your bag.  Mine was five inches.


This bag shows another way to use a doilie to dress up your bag.   First, I ran the bag through my printer to add Merry Christmas.  I then placed a doilie folded in half over the top, punched two holes and strung a ribbon through.


For this last bag I folded the top over twice, then layered two ribbons on top of each other, rapped them around the bag and secured them with some doubled sided tape.  I then used this free printable tag from Kara's Party Ideas to add the final touch.


Here they all are.  What a transformation!  Which is your favorite?