Monday, April 29, 2013

New Food Blog and Healthy Fudge Bites


As a mother I want to do the best I can to take care of my children.  One of the ways I feel I do that is to feed my children healthy food.  I've always felt that I've done my best in that area but I also know that what I define as healthy has changed over the years.  I've been on a long food journey and have made gradual changes as I've become more educated on the subject of healthy food and what that really is.  I don't claim to know everything about eating healthy but I do know I have learned a lot of things.  

I think one of the hardest things about making healthy changes in your diet is knowing what to eat instead of the not-so-good-for-you processed stuff.  I'm by no means a gourmet cook (I actually don't really even like to cook) but I have come across some great recipes over the years.  I've been fighting the idea for the last year, but I finally decided to start a food blog to share some of my tried and true favorite recipes.  So if you're ever in a rut and don't know what to make for dinner or a healthy snack or treat I hope you'll stop by and take a look.  

Today I'm posting my healthy fudge bites at my new blog Nourishing Bites.  I'd love for you to stop by. 


Monday, April 22, 2013

Family Proclamation Art


We haven't been in our new house for even a year yet and I'm still trying to fill some of the empty walls.  Several months ago I spotted this print and it's been on my mind ever since.  I loved the idea of displaying the words from this quote: 

"Successful marriages and families are established and maintained on principles of faith, prayer, repentance, forgiveness, respect, love, compassion, work, and wholesome recreational activities."  (Find the entire document here.)

But how would I showcase these important words?  Would I purchase and frame it?  Try to recreate it?  Put it on canvas?  The ideas were swirling around.  I finally decided to purchase a large canvas (24x36) with my 40% off coupon at Hobby Lobby.


Since I wanted it to make a statement I painted it crocus yellow.  It took about one bottle of paint to cover the entire thing.


Next I designed a layout with my Silhouette.  I used 3 different fonts (Copperplate Gothic, Rockwell Extra Bold, and Rochester).


I really love how it turned out and I'm so excited to have these wonderful principles displayed in our home.


Tuesday, April 16, 2013

My Interactive Book of Mormon Stories (Giveaway Closed)


Jeanine and I have mentioned before that we are members of The Church of Jesus Christ of Latter-day Saints, also known as Mormons.  This giveaway caters to our readers that share our faith, but I hope you all will take a look at this fun product. I'm really excited to share this product with you because I think so many mothers out there are looking for something just like this.


I was recently contacted by My Interactive Book of Mormon Stories about their new products for teaching children the Book of Mormon stories in a fun interactive way.  They have two volumes available. Each volume contains nine stories that include a story summery and activity on each page.


Each volume is sent to you as a PDF file and you simply have to print out the pages and laminate them.  I used my home laminator and then took them to Office Max and had them spiral bound.


My kids have watched as I've assembled the books and have been looking forward to playing with them.  These make the perfect Sunday activity and are fun for bring along to church as well.  My kids have had a lot of fun reading the stories, moving the pieces around and doing the activities and I love the quality of these books.


This little video explains a little more about them and what is included in the books:


If you think this is something you'd like to make for your children visit the My Interactive Book of Mormon Stories shop. 

My Interactive Book of Mormon Stories is also very generously giving away three sets to three lucky readers.  Enter to win below and tell your friends!  You know they'll want one too.


Thursday, April 11, 2013

eShakti Spring Line


Amy has told you about eShakti before and how we ordered our bridesmaid dresses for our younger sisters wedding from them.  I recently decided to buy a dress from their new spring line.  It was so hard to choose just one!  There are so many cute dresses to choose from!

I finally settled on this colorblock dress.  


I'm always drawn to high-waisted dresses--I really like them!  The original dress had cap sleeves and a low v-neck.  With any other company I would have passed on the dress or chosen to alter it somehow.  But with eShakti I didn't have to worry!  I was able to change the sleeves and raise the neckline a little.

I love this dress!  It fits well and if you haven't heard--all their dresses have pockets!  What is better than a dress with pockets?


**Disclaimer: I was given a dress to review but all opinions are mine and mine alone.

Monday, April 8, 2013

Spring Break Science


Last week was our spring break.  Since our weather is still very cold we had to create some indoor fun.  Between watching movies, arts and crafts, and playing games we kept pretty busy.  One of our afternoons we filled doing science experiments.  Not all the experiments worked out perfectly but we still had fun.


Yellow + Blue = Green
This is a good one to start with since it takes several hours to see the results.  Fill one cup with yellow water and another with blue.  Place a paper towel going from the colored cups into an empty one.  It's fun to see the water creep up the paper towel and change into green in the empty cup.  The results are much better than what I have shown.  I just never got around to taking a final picture.  Eventually the water level in all three cups will become even.


Balloon Rocket
My kids loved this one.  String a straw onto a long piece of yarn.  Tie the yarn between two chairs.  Blow up a balloon and hold the end closed.  Tape the balloon to the straw and then let it go.  It's fun to predict how far the balloon will fly with different amounts of air in it.
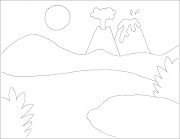


Glitter Volcano
Add 1-2 tablespoons of baking soda into a tall vase along with a few drops of red food coloring and some glitter.  Pour some vinegar into the vase and watch what happens.  Try it again with something besides glitter.  Predict what you think will happen.


Density Rainbow
Add sugar and food dye to four cups as indicated below.  Pour three tablespoons of water into each cup.  Stir until dissolved.

In an empty cup use a spoon to carefully layer the water.  Start with blue, then green, yellow, and finally red.  If you layer carefully enough the colors should remain separated.  Why does this happen?  By using different amounts of sugar in each glass the concentration was different for each color.  The most dense solution sinks to the bottom and the least dense sits on top. Ours didn't turn out nearly as good as this one, but we got the idea.


Baking Soda Bombs
Place 1.5 tablespoons of baking soda into a paper towel and wrap up.  In a ziploc bag add 1/2 cup vinegar and 1/4 cup water.  Place the paper towel bundle into the bag, zip, and shake.  Stand back and watch the bag inflate.  The bag is supposed to pop, but ours never did.


Inflating Balloons
In a water bottle or jar add 1/2-1 cup of vinegar.  Use a funnel to pour 1-2 tablespoons of baking soda into a balloon.  Stretch the balloon end over the bottle, being careful to not let any of the baking soda get into the bottle.  Lift the balloon up and shake the baking soda into the jar.  Watch as the balloon fills with gas and inflates.  This experiment is a popular one at our house.  I never get tired of the look on my kids faces as they watch the balloons fill up on their own.


Have you done any science experiments with your kids that were successful?  Please share!


Tuesday, April 2, 2013

Rosy Crafts Auction


My friend, Jenny, is super talented.  Ladies around here joke about getting pregnant again--just so they can be the recipient of one of her amazing quilts!  Each one of her creations is uniquely beautiful.  


She is currently hosting an auction of a quilt to help out a friend with stage 4 melanoma.


If you want a chance to win this beautiful quilt head on over to her blog: Rosy Crafts.  You really don't want to miss out!

Monday, April 1, 2013

Super Hero Portraits


For my son's birthday last year he had a super hero party.  To decorate for the party I printed out some super hero logos to make a banner. 


When the party was over I saved the logos.  I guess you can say that I'm a little conservative with my printer ink . . . okay, really conservative.  All that ink I used to print them out . . . I didn't want to just throw them away.  There had to be something else we could do with them. 

Well, they ended up becoming the perfect craft for a gloomy cold day.  With some large sheets of construction paper we used the logos to make some super hero portrait posters.  My son loved the project, and it was fun for me to see his artistic side come out and how interested he was in getting the details right.


These posters make for some fun art to decorate the walls in the basement playroom.


And my son is so proud of the super hero posters he created.