Monday, January 31, 2011

Absorbing Art


We love to do kitchen crafts at our house.  I found this little project over at Family Fun and decided we'd give it a try.  So glad we did. 


Here's what you'll need:
Card stock
Rimmed baking sheet
White glue
Salt (lots of it)
Colored water (1 tablespoon of water to every five drops of food coloring)
Eye dropper


First you'll want to get your colored water ready.  We used blue, red and green.


Next, place your paper on the baking tray (this is just to keep things clean) and draw your design on with the glue.  Then cover all that glue with lots and lots of salt. Make sure it's good and covered, then shake of the excess into the sink or trash.


Now use your dropper to add some color to your picture.  Drop the colors along your design one drop at a time and watch as the color is absorbed by the salt and spreads along the lines. 


Be sure to be watching when colors reach intersecting lines.

So much fun!


Monday, January 24, 2011

ABC Reverent Book


Not quite up to the to making a fabric quiet book? This simple little book can be done in minutes and is perfect for giving little hands something to hold and look at during church.


This idea came from Oopsey Daisy. I thought it would be a perfect simple project for our church craft day last year. But after pricing everything the total was going to come to around $8 per book--which was too expensive. I decided to redo it myself adding the wording to the pictures, which cut the pictures in half, and allowed us to buy the 99 cent photo albums bringing our total to $3 and making it a doable project.

My kids have enjoyed their little books.

I thought those of you who share this faith might like one too.

Want to make your own?
1.Click on picture to enlarge.
2.Right click and save.
3.Get them printed off wherever you would like (I get mine printed at Snapfish for 8 cents each).
4. Insert pictures into a mini 4x6 album.


Let me know if you have any questions.
Thanks for the great idea Alison!


Friday, January 21, 2011

Quiet Book Cover


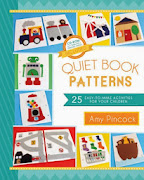
Looking for more quiet book ideas?  Check out my new book Quiet Book Patterns: 25 easy-to-make activities for your children now on sale at amazon.com.  Full of original ideas and includes a CD to print off templates!


I've been asked some questions about how I made the cover for my quiet books. I don't have a tutorial for you but I can give you a little info for those of you who would like it.


I used flannel for my cover, but any sturdy fabric will do.
I started out by cutting two 17 x 10 inch pieces of fabric.
Take one of those pieces and fold it in half to find the center.  Mark where you want your holes to be so they will line up with your pages.  You will then want to move out from the center 1/4-1/2 inch to the right of the center and to the left of the center and sew a button hole.  You will end up with six button holes all together.
Once you're done, carefully cut your button holes open.

I also added a pocket to the inside back cover.


You'll then want to make your closure strap.  Once done sandwich it in between your two 17 x 10 inch pieces, right sides together.  Sew together using a 1/4" seam allowance.  Leave an opening to turn right side out.  Then sew up your opening.  I added a top stitch all the way around once I was done.

Add a piece of velcro to the outside of book, lining it up with your closure strap.

Use ribbon to bind your pages into the book, sliding the ribbon through the button holes and through each page.  Then tie your ribbon to secure.


I hope this little bit of information will help you with your covers.
 Let me know if you have any other questions. Have fun making your books!


Wednesday, January 19, 2011

Serving Pink Lemonade Quiet Book Supply List


Looking for more quiet book ideas?  Check out my new book Quiet Book Patterns: 25 easy-to-make activities for your children now on sale at amazon.com.  Full of original ideas and includes a CD to print off templates!


Supply list to make two quiet books

  • 1 ½ yards non-fusible Pellon
  • 1 ½ yards wonder under
  • ½ yard fabric for each quiet book cover
  • Velcro
  • 20 Sew on Snaps  -size 2/0
  • Stiff felt
    • Red (2 sheets)
    • Orange
    • Yellow
    • Green
    • Blue (2 sheets)
    • Purple
    • Gray (4 sheets)
  • Felt
    • Pink
    • White
    • Off white
    • Brown
  • Fine tip Sharpie marker
  • Various colors thread
  • Three 7 inch zippers (if doing the zipper page)
  • Ribbon (to tie pages together)
  • Pink ribbon for ballet shoe
  • Small google eyes
  • Iron transfer paper
  • Brads
  • 2 paintbrushes


Cut Pellon into 8 ½” x 7” pages.

For quiet book cover, cut two 17” x 10” pieces (includes  ¼” seam allowance) for one cover.  For quiet book cover instructions click HERE.


Tuesday, January 18, 2011

Quiet Book Templates


Looking for more quiet book ideas?  Check out my new book Quiet Book Patterns: 25 easy-to-make activities for your children now on sale at amazon.com.  Full of original ideas and includes a CD to print off templates!


Thank you for all the kind comments about the quiet books.  I was happy to hear that several of you plan on making one. (You can see them HERE.)


First lets talk about supplies.
Contrary to popular belief I didn't use felt for my quiet book pages.  I used Pellon.  If you like felt you'll love Pellon.  It doesn't stretch or loose it shape and it doesn't get little fuzzy balls all over it like felt does.  I would have made my entire book out of Pellon except it only comes in white--as far as I'm aware anyway.  Back in the day when my mom made quite books she did the entire thing out of Pellon and painted all the pictures and pieces.  They've held up extremely well over the years and are still like new.  I've tried painting Pellon for a previous project and it isn't easy, so I opted out, but tried to use it where I could.  The Pellon I used for the pages was the thick non-fusible kind.  I also used a thin kind in other places.  Pellon can be found at JoAnns by the interfacing and fusible webbing.  If you can't find it just ask.  They'll know what you're talking about.


For all the pictures on my pages I decided to use felt.  It's so much easier to use than fabric since you don't have to worry about fraying or finishing edges.  The down side of felt is that sometimes it doesn't hold up very well.  I was putting a lot of time into these books and I wanted them to look good for along time.  I was really hoping that I could find some fabulous colored Pellon out there, but no such luck.  I then remembered seeing some stiff felt at JoAnn's and Hobby Lobby and decided to use that instead of the regular kind in hopes that it would hold up better.  It's been working great so far.  I didn't use stiff felt for everything, but I'd say I used it for about 80% of the book.


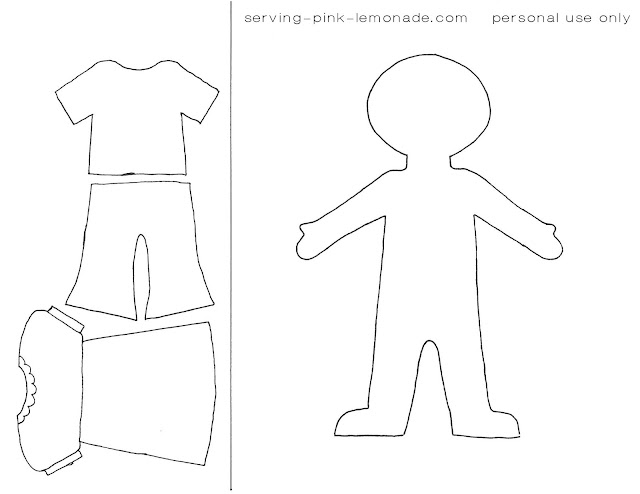
Each of my books has eleven pages plus the cover page.  I had too many ideas to make them the same so each book has two original pages--my daughter has the ballet slipper and dress up doll, and my son's book has the tennis racket and zipper page.  There's also a kite puzzle page that I decided not to do but am providing it for you.  I don't have a template for the zipper page since it seems self explanatory.

For velcro I used the clear sticky dots. These books don't really need clear velcro but I love that kind because it is so ultral thin and I thought it would help limit the bulkiness of the books.  I get my velcro at Walmart.

This book requires a lot of fusible webbing and ironing.  I think the easiest way to do this process is to place your template under the fusible webbing and trace it.  Remember to do the reverse image.  Then roughly cut out your picture--not on the lines.  Iron onto your felt (be sure to use a press cloth to protect your iron) and then cut out your picture on the lines.  This method is the easiest way to do it.

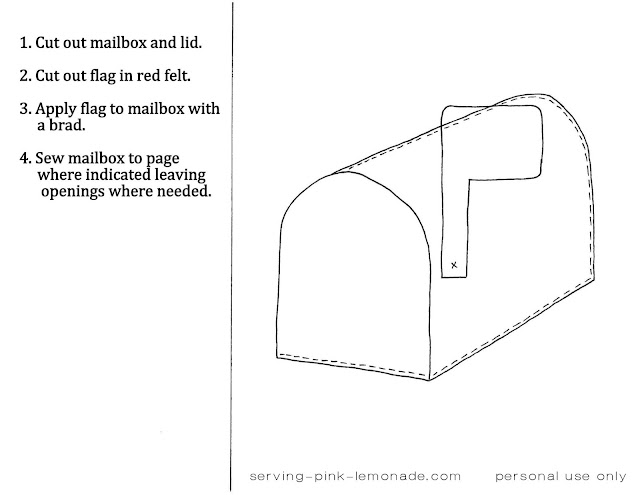
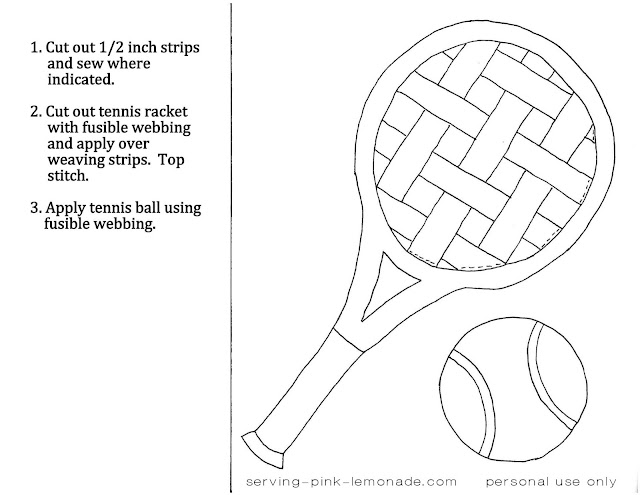
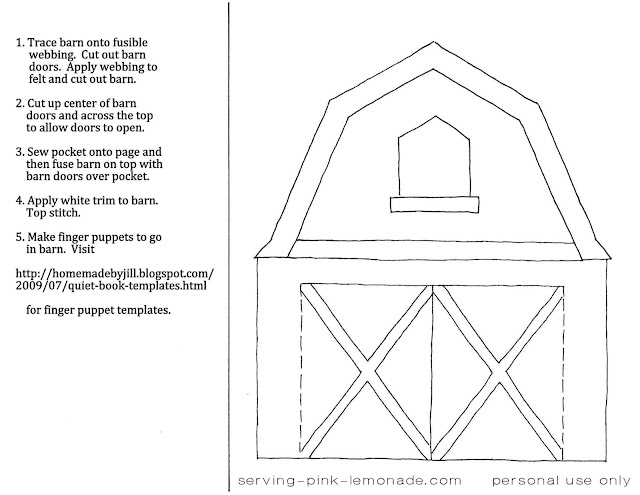
Each template should print out on a full horizontal 8 1/2 x 11" paper.  Each page includes some simple assembly instructions.  Most pages are done like I did my dinosaur mat here.


And the moment you've all been waiting for . . .
The templates!

You can view the supply list HERE.


(To print templates: Click on picture and then copy and save to your computer.  Open in a Word document and reduce your margins to zero.  Expand to 100% and print.)

Homemade Quiet Book - Free Templates
Circus monkey can be found HERE. You can either print it out on a thin Pellon straight from your printer or you can use iron-on transfer paper and iron the image onto a thick Pellon.  I chose to use the transfer paper since I already had some.
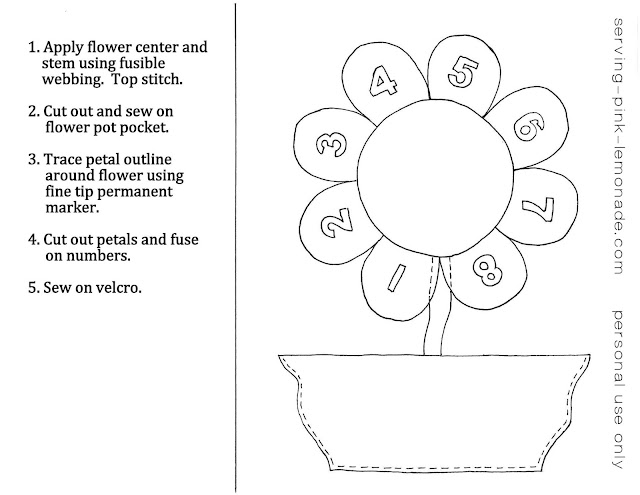

Homemade Quiet Book - Free Templates


Homemade Quiet Book - Free Templates


Homemade Quiet Book - Free Templates


Homemade Quiet Book - Free Templates


Homemade Quiet Book - Free Templates


Homemade Quiet Book - Free Templates


Homemade Quiet Book - Free Templates


I've received comments from people surprised that I was giving away all this information for free.  But this is why I created this blog, to share ideas but to also make those ideas doable for you. Please be respectful of my ideas and templates that I'm graciously sharing with you.  Personal use only please.  Thanks!  And have fun!!!

If you make a quiet book I'd love to see it.