Monday, May 27, 2013

Homemade Magnets


These homemade magnets make a fun gift.  I had my daughter help make a set to give to her teachers aid at school for teacher appreciation week.  I also had the girls in my 8-11 year old activity days group at my church make them for a mothers day gift.

With a stack of coordinating scrapbook paper you can get really carried away making them too.  There are just so many fun and cute combinations to do.  And the best part is packaging them!  I got this fantastic packaging idea from Sabby.  Want to know what it is?


First you have to make your magnets.  Start with some clear one inch stones.  I get a bag of them from the dollar store.  Decide what paper you want to use, lay your stone down, and trace around the the stone with a pencil.  Cut it out (slightly smaller than your outline), brush a tin layer of modge podge on your stone and lay the paper on top.  Add another thin layer of modge podge on the back and allow to dry.  Once dry apply your magnets using a hot glue gun.


Now here comes the awesome packaging part.  Cut out a piece of cardboard and glue washers where you want your magnets to be (I use tacky glue).


When you place your magnets on top of the washers they stick!  Awesome, huh?


Now slip your package into a clear bag and add a topper using coordinating scrapbook paper.  Doesn't that make for a fun presentation?  I just love it!


I know teacher appreciation day is long past but I'm curious, for all you teachers out there, what kinds of gifts do you appreciate the most?


Monday, May 20, 2013

The Secret Is Out!


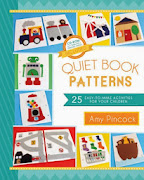
If you follow along on facebook then this isn't new news to you, but if you don't I'm excited to finally share that I'm publishing a book!!!  Yes, that's right, little ol' me has a book that just went up for pre-sale on amazon.com and Barnes and Nobel, Quiet Book Patterns: 25 easy-to-make activities for your children.  Thank you to all my fabulous readers out there for making my quiet book posts so popular.  The book is still in the early stages and is scheduled to be available October 8, 2013.  I know it's still a little ways off but I just had to share my exciting news now that I can.  I'll for sure keep you all up to date on the progress and there will definitely be a giveaway in the future.

Thanks for being such fabulous readers!


Monday, May 13, 2013

Boys Lined Tote Bag with Tutorial


As promised, today I'm going to show you the tote bag I made for my son.


He picked out stripes with blue on the bottom, a green polka-dot interior, and green ribbon handles.


Want to make your own?  Here's what you'll need:
In case you didn't know . . .
The side of your fabric with the print is known at the "right side".  
The back side of your fabric is known as the "wrong side". 


For the exterior: Pin the striped pieces to each 8" side of the blue fabric and sew a quarter inch seam.
For the lining: Fold in half, right sides together, pin and sew a quarter inch seam up sides.  Leave top open.


Once you've sewn your exterior pieces together you'll have one long piece that looks like this.  Press seams flat with an iron.


Now fold your fabric in half, right sides together, pin and sew up sides at a quarter inch.  Leave top open.


Now press the seams open for you bag and bag lining.  This will help it to lay better. Fold the top edge over a 1/2 inch and press.  


Turn your bag right side out and place your lining inside.  Insert 1/2 inch of the ribbon handles between the bag and lining, match edges and pin around bag.  Sew around bag opening to secure lining and handles at 1/8 inch.


Now you're all done!  See how easy that is!


Enjoy your new tote bag!

See the bag I made for my daughter here.


Monday, May 6, 2013

Girls Lined Tote Bag


My daughter has a little bag that she brings to church each week.  She carries all her important things in it like her scriptures, some tissues, and pencil and paper.  Her well loved bag was getting pretty worn so she asked if I could make her a new one.  Of course I was happy to, especially if it means using up some of my fabric scraps I have piling up.


We dug through my fabric drawers and pulled out some different combinations.  It was a hard choice, as is always the case when you have too many options, but I love what she decided on.


Flowers, ruffles, and a pretty sky blue.


And of course a pretty pink interior.


Just right for holding all her important things.


And because sometimes a girl just needs a new bag.


After finishing my daughters bag my son decided he need a new one too. 
Click here to see what he picked out, along with a tutorial on how to make this simple lined tote bag.