Monday, March 31, 2014

Quiet Book Games Part 5: Dots and Squares (Free Template Included)


Today I'm sharing the final post in my quiet book game series.  I hope you've had just as much fun with them as I have!  Today's quiet book game is probably my favorite, Dots and Squares.   You will find the free template as well as links to the other posts in this series at the end of this post.

Be sure to check back next week for my big giveaway!  You won't want to miss it!


Growing up my sisters and I called this game "the dot game".  My husband informed me that it is called "squares".  Upon doing a little research I learned that this game goes by many names including: dots and boxes, squares, pigs in a pen, paddocks, square-it, dots and dashes, dots, smart dots, dot boxing, or simply the dot game.  That's a lot of names!  It looks like both my husband and I were right.  If you're not familiar with the rules of this game you can find them here.


To make a dots and squares quiet book game you need:
1. Template (found at the end of this post)
2. A pre-cut blank quiet book page.  I always use Pellon peltex for my quiet book pages--it's sturdy and you don't have to worry about fraying edges.  I make all my quiet book pages 7 x 8.5 inches.
3. A piece of 12 or 16 gauge vinyl, roughly 9 x 10 inches.
4. Acid free permanent marker
5. Dry erase marker
6. Single hole paper punch


Instructions:

Use your single hole paper punch to make the holes for binding in your quiet book page.  Download the template and print it out.  Cut out template and lay it on your quiet book page.  Use the dots on the template as a gauge for where to mark the dots on your quiet book page.   Mark the dots along the right and left sides and across the top using your marker.


Slide the template down and continue to mark the dots, using the template for a guide, until you've reached the bottom of your page.  


You now have a page full of dots.


To make your game erasable you need to add a vinyl surface to the page.  To do this roughly cut a 9 x 10 inch piece of vinyl--it's easier to apply if the vinyl is slightly bigger than your quiet book page.  Place the vinyl over your page and pin it along each edge and each corner.  Make sure it's pulled taught as you pin each side.  Sew around all four sides at an 1/8 inch seam.


The tricky thing about sewing vinyl is the presser foot sticking to the vinyl.  To help your presser foot glide along smoothly apply matte finish Scotch tape to the bottom of the presser foot as shown below.  This works wonderfully (and eliminates a ton of frustration!).


Now trim off the excess vinyl that is hanging over the edge of your page.  Re-punch the holes that the vinyl covered up.  Your hole punch will easily cut through the vinyl.


Now your game is ready to play.  Use a dry erase marker when playing to easily erase the game when done--the kind with the built in erasers make for easy clean up.


Be sure to check out the other posts in this series:

Part 1: Othello
Part 2: Simple Puzzles
Part 3: Tic-Tac-Toe
Part 4: Memory Match


(To print templatesClick on picture below to enlarge, then right click and copy.  Open a word document, reduce your margins to zero and paste.  Expand to 100% and print.)


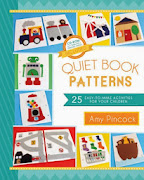
Like this quiet book idea?  Find more of my quiet book ideas here and in my new book Quiet Book Patterns: 25 easy-to-make activities for your children.


Monday, March 24, 2014

How To Add an Image Onto Fabric Using Your Ink Jet Printer


Today I wanted to share with you how I printed the squares for my I Spy quilt that I shared last week.  (See it here.)  It was really easy to do, but I have to say that I was so nervous to try it.  I started by making a sample square and ran it through the wash a few times because the last thing I wanted to happen was for all the printed squares on my quilt to fade after I put it in the wash once or twice.  When testing my sample this was the only time I ever pulled something out of the washer and hoped that the mark was still there!  I was so relieved to see the print still looking dark and crisp--no fading at all.


Here's how I did it:

Cut an 8.5" x 11" piece of fabric and freezer paper.  Iron the fabric to the freezer paper using a synthetic setting on your iron.  You want to make sure the fabric is good and stuck to the freezer paper, especially in the corners.  If you use too much heat and pressure with your iron though you will not be able to remove the freezer paper later.  Remember doing a sample test never hurts.  After you've ironed your fabric and freezer paper together it's ready to run through your printer.  Before printing I went to my printer options and selected "professional quality" so that I would get the darkest, best print possible.  Then I printed it just like I would a normal sheet of paper.


Once printed, separate the fabric from the freezer paper.


Now you'll want to heat set your image.  I used a high heat setting with no steam.  The idea is that you want to evaporate any moisture from the ink to make the image set.


After that I cut out my printed fabric into 5x5 squares to use for my quilt.


I think they turned out perfect!  Nice, dark, clean sharp printing!


And here's my quilt all done!  These little I Spy squares really added a nice touch to this fun quilt.


Have you tried printing on fabric before?  How did it work for you?


Monday, March 17, 2014

I Spy Quilt (with ink jet printed squares)


Jocelyn over at The Quiet Book Blog is giving away a copy of Quiet Book Patterns.  Today is the last day to enter so be sure and hurry over for your chance to win.  Find the giveaway HERE.
. . . . . . . . . . . . . . . . . . . . . . . . . . . . . . . . . . . . . . . . . . . . . . . . . . . . . . . . . . . . . . . .


It's taken me a while to get around to sharing this but it is one of my favorite projects of late.  For Christmas last year I made my kids an I Spy quilt.  A fabulous friends of mine was making one and shared her fabric with me so I really had no excuse.  It's been years since I've made a quilt and it was so much fun.  I just love how all those little squares line up perfectly and I love watching it all come together piece by piece.


This quilt has been lots of fun!


Did you see my little I Spy squares in the pictures above?  Here's a closer look:


I'm just so happy how those little printed squares turned out.  And guess how I printed them?  Simply using my printer at home!  To see a tutorial of how I did it go HERE.


We have had an unusually cold and snowy winter this year so the fuzzy fabric I picked for the back made it the perfect blanket to cuddle up in on a cold day.


Nice and cozy for curling up to watch a movie or for playing a little I Spy.


I just love quilts!


I had so much fun making this one I pretty tempted to make another soon.


Be sure to check back next week to see how I made those printed I Spy squares.


Thursday, March 13, 2014

Celebrating Pi Day


March 14th is Pi day (you know... 3.14?)  So to help you celebrate here are a few fun books about pie you and your little ones can read together.
http://www.amazon.com/Ugly-Pie-Lisa-Wheeler/dp/0152167544

Ugly Pie by Lisa Wheeler
Bear wakes up with a craving for some Ugly Pie.  As he makes the rounds to his neighbors he finds lots of wonderful pies--but no Ugly Pie.  He gathers ingredients along the way and goes home to bake his Ugly Pie--which he generously shares with his neighbors. 


http://www.amazon.com/Pie-Sky-Lois-Ehlert/dp/0152165843/ref=sr_1_2?s=books&ie=UTF8&qid=1394642541&sr=1-2&keywords=pie+in+the+sky

 Pie in the Sky by Lois Ehlert
I always love the illustrations in Lois Ehlert's books.  This story follows a father and son as they watch their cherry tree throughout the seasons--with a delicious ending!


http://www.amazon.com/Enemy-Pie-Reading-Rainbow-book/dp/081182778X

Enemy Pie by Derek Munson
 When a boy moves down the street during the summer he becomes neighborhood enemy number one.  Dad happens to know how to get rid of enemies: with Enemy Pie.  However, the secret ingredient is to spend the entire day playing with the enemy.  Will it work?  Can Enemy Pie turn worst enemies into best friends?


* * * * *


Back in the day when I only had one little boy I entered the local pie contest which was touted as the "biggest pie festival west of the Mississippi." I was so surprised when I won first place for my apple pie!  So in honor of pi day I'm sharing my recipe with you!


Jeanine's Blue Ribbon Apple Pie

Crust:
3 cups flour
1 cup Crisco shortening
1 1/2 teaspoons salt
7-9 Tablespoons ice cold water

Mix flour and salt.  Cut in shortening.  Slowly add the ice water while you mix, until you have dough.  Divide into 2 equal sections (one for the top and one for bottom). Roll out on a floured surface.

Filling:
6 Granny Smith apples, pared, cored and thinly sliced (about 6 cups)
3/4 cup sugar
2 Tablespoons of flour
1/2-1 teaspoon cinnamon
dash of salt
dash of nutmeg

Preheat oven to 450 degrees.  Combine sugar, flour, spices, and salt.  Mix with apples.  (Sometimes I let this mixture set overnight or for a few hours to let the juices come out.)  Line your pie plate with pastry.  Fill with the apple mixture and dot the top with butter.  Adjust the top crust, cutting slits for steam.  Seal the edges and sprinkle the top with sugar.  Bake for 15 minutes.  Lower the over to 400 degrees and cook for about 35 more minutes or until golden brown.


Monday, March 10, 2014

Quiet Book Games Part 4: Memory Match (Free Template Included)


Today is part four in my quiet book game series.  Just one more to go!  Don't forget to stop by for my big giveaway once the series is through.

You will find links to the other posts in this series at the end of this post.


Matching games are fun for children of all ages.  I always enjoy playing them with my kids!  Do we ever really out grow them?  You can even simplify the game for very young children by playing with all the cards facing up.  The memory game I've created can also help toddlers and preschoolers learn their colors and shapes.  There are lots of learning opportunities packed into this little game.


What you'll need to make a memory match quiet book game:
1. Template (found at the end of this post)
2. Two pre-cut blank quiet book pages.  I always use Pellon peltex for my quiet book pages--it's sturdy and you don't have to worry about fraying edges.  I make all my quiet book pages 7 x 8.5 inches.
3. Various colors of felt
4. Fusible webbing (I use Pellon wonder under)
5. Acid free permanent marker
6. Single hole paper punch


Instructions:

Download and print out the template.  Place the template under your fusible webbing and trace two of each shape.


Bubble cut around the shape pairs.  Following the fusible web instructions use your iron to adhere the shape pairs to different colors of felt.


Cut out the shapes.  Also, use the rectangle template to cut out 36 of the game cards.  Fold your felt in half to cut two at once to help it go faster.


Peel off the paper backing from your shapes and place them, fusible webbing side down, onto the rectangle game cards.  Use your iron to fuse the shapes to the cards.  Remember to cover your project with a scrap piece of cotton fabric to protect it when ironing.


Pin another rectangle piece to the back of each game card and sew around the edges at 1/8".  The two layers makes it so you can't see the shapes through the back of the cards.


Now use your rectangle template and a permanent marker to trace nine squares onto each quiet book page.  Remember to use a single hole punch to place holes along the edge for binding.


Place completed game cards onto your quiet book page face down for playing.


Have fun with your new memory match game!


Be sure to check out the other posts in this series:

Part 1: Othello
Part 2: Simple Puzzles
Part 3: Tic-Tac-Toe
Part 5: Dots and Squares

(To print templatesClick on picture below to enlarge, then right click and copy.  Open a word document, reduce your margins to zero and paste.  Expand to 100% and print.)


Like this quiet book idea?  Find more of my quiet book ideas here and in my new book Quiet Book Patterns: 25 easy-to-make activities for your children.


Monday, March 3, 2014

Quiet Book Games Part 3: Tic Tac Toe (Free Template Included)


Today is part three in my quiet book game series.  I hope you're enjoying them!  Today I'm share how to make a tic-tac-toe game.  Who ever gets tired of this one?

  Be sure to check out the other posts in this series too!  (You'll find them listed at the end of the tutorial.)  Don't forget to check back in a few weeks for a huge giveaway once this series is over.


What you'll need to make a tic-tac-toe quiet book game:
1. Template (found at the end of this post)
2. A pre-cut blank quiet book page.  I always use Pellon peltex for my quiet book pages--it's sturdy and you don't have to worry about fraying edges.  I make all my quiet book pages 7 x 8.5 inches.
3. Black felt.
4. Fusible webbing (I use Pellon wonder under)
5. Velcro, strips and sticky dots
6. Two sets of 5 coordinating buttons


Instructions:

Download and print the template.  Place the template under the fusible webbing and trace the tic-tac-toe board using a pencil.


Bubble cut around the tic-tac-toe board.


Now iron it to your black felt following the fusible webbing instructions.


Use your scissors to cut out the tic-tac-toe board and then peel off the paper backing.


Lay your tic-tac-toe board (fusible webbing side down) onto your quiet book page.  Cover with a scrap piece of fabric and use your iron to adhere the board to the page.


Sew a strip of velcro to each end of your quiet book page.  Place velcro sticky dots to the back of your buttons.


Use the velcro strip to store the buttons when not playing.


Don't forget to add holes for binding along the edge of your page using a single hole punch.  Enjoy playing your new tic-tac-toe game!


Be sure to check out the other posts in this series:

Part 1: Othello
Part 2: Simple Puzzles
Part 4: Memory Match
Part 5: Dots and Squares


(To print templatesClick on picture below to enlarge, then right click and copy.  Open a word document, reduce your margins to zero and paste.  Expand to 100% and print.)


Like this quiet book idea?  Find more of my quiet book ideas here and in my new book Quiet Book Patterns: 25 easy-to-make activities for your children.