Showing posts with label Recipes. Show all posts

Thursday, April 25, 2019

Healthy No Bake Cookies


No-bake cookies were a favorite of mine as a girl. I wanted to share this childhood favorite with my kids but most no-bake cookie recipes call for a whopping two cups of sugar! This grown up healthier version tweaks the ingredients a tad to make them better for you. Instead of all that sugar these cookies are sweetened with only 1/3 cup honey. I think this recipe tastes just as good as the original except that I feel better feeding it to my family.

We have a peanut allergy in our house so instead of the the traditional peanut butter I use sunflower seed butter and we like them just as much that way. I also like to use a combination of old fashioned oats and quick oats to add some variety to the texture. If you only have one or the other on hand just use what you have and they will still be delicious.


Healthy No-Bake Cookies

Ingredients:

1 cup sunflower seed butter or other nut butter
1/3 cup raw honey
1/4 cup grass fed butter
1/4 cup coconut oil
1 cup semi sweet chocolate chips
1 1/2 cups old-fashioned oats
1 cup quick oats
3 tablespoons cocoa powder

Get the rest of the recipe over at Nourishing Bites.


Monday, September 17, 2018

Pumpkin Banana Muffins (Egg free, Gluten free)


If you're looking for a clean eatin', gluten free, egg free, dairy free, vegan muffin you've come to the right place. These muffins have conquered the impossible. They are so moist and flavorful despite being gluten and egg free.

This is pretty much the only muffin I make these days. This recipe is a great way to use up all my ripe bananas, they're a hit with all my kids, and they're very versatile. To keep things from getting too boring I rotate between adding chopped up apple, mini wild blueberries, and mini chocolate chips to the batter. Even though I use the same base recipe each time my kids feel like they're always getting something new. I do have to note that I am quite opposed to chocolate chips in muffins. The flavor is just wrong to me and I don't think chocolate chips belong in breakfast food. So why I add them to these muffins on occasion is beside me. I guess I love to see the joy on my kids faces when they see chocolate chips in their muffins. I don't know. My favorite way to eat them is without any mix-ins but with pecan pieces sprinkled on top. I'm smart enough to know to only make a few of those per batch though since they aren't very popular with anyone else.

This recipe is quite large, yielding two dozen muffins, so feel free to half it if a smaller batch works better for your family. I like doing a large batch so I can use a whole can of pumpkin without any leftover and I like having some muffins to freeze for a later day.


Pumpkin Banana Muffins
nourishing-bites.blogspot.com

Ingredients:

6 overripe bananas
15 ounce can pumpkin (I like this kind)
2/3 cup coconut oil, softened or melted
1 cup honey or pure maple syrup
3 teaspoons vanilla
4 cups oat flour (I like this kind)
2 teaspoons baking soda
1 1/2 teaspoon baking powder
1 1/2 teaspoon Real Salt
1 teaspoon each: cinnamon, ginger, pumpkin pie spice
Mix-ins of choice (optional): Pecans, peeled and diced apple, wild blueberries, mini chocolate chips


Get the rest of the recipe over at Nourishing Bites.


Wednesday, December 6, 2017

Nourishing Hot Chocolate (Dairy Free, Paleo)


Nothing feels better when you're chilled to the bone on a cold winter day than to drink a nice hot cup of cocoa.  It's amazing how a hot drink can warm you up and make you feel so much better. There are a lot of things I like about this recipe but what I love the most is that it isn't full of sugar. When my kids come in from playing in the snow I hate to hand them mugs of hot chocolate filled with sugar day after day. That's definitely not what their little bodies need to keep them healthy over the long winter. This recipe is sweetened with a little bit of honey so you can fill good about letting your kids drink it all season long.

I also love how rich and creamy this cocoa is and that it keeps me feeling full for hours thanks to a spoonful of grass-fed butter and coconut oil I throw in there. (And in case you've heard the rumors that coconut oil isn't healthy you just *might* have been hoodwinked. I love what this cardiologist says about coconut oil and what this researcher shares about who funded the studies that the American Heart Association based their claims on. Hmmm...)

This recipe is also incredibly flexible. Allergic to eggs? Leave it out. Not a huge fan of dark chocolate? Add less cocoa powder. Don't have any coconut oil on hand? Just double the butter. Do what works for you. Chances are you won't go wrong.


Nourishing Hot Chocolate
nourishing-bites.blogspot.com


Ingredients:

1 cup boiling water
1-2 tablespoons cocoa powder
1 tablespoon coconut oil
1 tablespoon grass-fed butter
1 tablespoon gelatin (I like Vital Proteins)
1 tablespoon honey or pure maple syrup
1 egg (preferably pastured)
small pinch of sea salt (I like Real Salt)


Get the rest of the recipe over at Nourishing Bites. 


Monday, January 2, 2017

Chocolate Gummies


I'll admit.  We're kind of obsessed with gummies at out house. I mean if you saw the shelf stuffed full of silicone molds in my kitchen dedicated solely for the purpose of making gummies your jaw might just drop. I have molds for just about every holiday now, plus everyday any-ol'-occasion molds. There's a lot of them. But they're such a fun snack--the kids love them, they're easy to whip up, and they're oh so good for you.

The health benefits of gelatin are numerous! Did you know gelatin can improve digestion, help maintain healthy bones and joints, help you sleep better, and lifts your mood? And as an added bonus, it nourishes your skin, nails, and hair!

Better pop one more gummy in your mouth! And then pass one out to the kids. They deserve a healthy treat too!


Chocolate Gummies

Ingredients:

1 cup full-fat coconut milk (from a can--not a carton, unless it's this kind--which is my favorite!)
3-4 tablespoons honey or pure maple syrup
3 tablespoons cocoa powder
2 tablespoons grass-fed gelatin
1/2 teaspoon vanilla

Get the rest of the recipe over at Nourishing Bites.


Looking for more yummy gummy recipes? Try these too!


Wednesday, November 2, 2016

Pumpkin Pie Custard


I love custard! Loooove it!

I loved it so much as a girl that when I was just nine years old my mother taught me how to make a simple four ingredient custard using the classic red and white gingham Better Homes and Garden cookbook. I learned pretty quick how to make it all by myself and loved that I could whip up one of my favorite treats all on my own. It's still one of my favorite recipes. Since my nine-year-old baking days I've branched out a little with my custard recipes. One of the favorites around our home now is this Pumpkin Pie Custard. I usually make up a double batch every week. My kids love to eat it as a morning snack and this past summer we found we loved the leftover custard in the fridge for a quick and easy breakfast. I love the pumpkin flavor blended with that classic eggy-custardy flavor. It's the perfect combination

This recipe is easy to whip together, the kids love it, and it's full of good for you ingredients. You really can't go wrong with this one!


Pumpkin Pie Custard
serving-pink-lemonade.com
(adapted from Nourished and Nurtured)

Ingredients:

1/2 cup butter (1 stick), melted and cooled
1 3/4 cup pumpkin puree (if using canned pumpkin this should equal one full can)
1/3 - 1/2 cup honey or pure maple syrup (I stick with 1/3 cup but you can up it for a sweeter taste)
4 eggs
1/2 cup milk kefir, plain whole milk yogurt, or coconut milk (optional)
1/3 cup almond flour (I like Wellbee's for it's fine texture)
2 teaspoons pure vanilla extract
1 teaspoon cinnamon
1/2 teaspoon ground ginger
1/2 teaspoon nutmeg
1/8 teaspoon ground cloves
1/4 teaspoon Real Salt

Get the rest of the recipe over at Nourishing Bites.


Monday, April 11, 2016

Healthy Melt in Your Mouth Pumpkin Pie Bars


I'm always on the search for healthy desserts and nutrient dense snacks that will fill my kids hungry tummies right up.  This recipe fits the bill for both.  These pumpkin bars by themselves make a great snack but by adding a few chocolate chips to the recipe I've tricked my kids into thinking they're now dessert.  Personally my favorite way to eat them is by ditching the chocolate chips and sprinkling a few chopped pecans on instead. Sometimes I will even sprinkle three-fourths of the pan with chocolate chips and the other quarter with pecans so everyone is happy.

Not only are these pumpkin bars easy to whip together and free of refined sugar but they taste amazing!  They are so moist and light they practically melt in your mouth.  There's no reason to wait until fall to make these dreamy bars.  They are the perfect treat any time of year. 


Healthy Melt in Your Mouth Pumpkin Pie Bars (GAPS, Paleo, Egg-free, Grain-free


Pumpkin Pie Bars


Ingredients:

3/4 cup creamy almond butter
1/2 cup pumpkin puree
1 well-ripened banana (should have lots of brown spots)
1/4 cup raw honey or pure maple syrup
1 tablespoon coconut flour
1 teaspoon pure vanilla extract
1 teaspoon pumpkin pie spice
1 teaspoon cinnamon
1 teaspoon baking soda
1/4 teaspoon Real Salt
1/3 cup mini chocolate chips or pecans (optional)


Get the rest of the recipe over at Nourishing Bites.


Thursday, September 3, 2015

How to Make Giant Bubbles + World's Best Bubble Recipe


Its seems the rest of the country has started back to school but my kids don't start until next week.  We've had such a fun summer together so I'm a little sad to have them starting school again (okay, lets be honest, super sad).  My kids are at an age where they play so nicely together for hours on end.  It's so fun to see them be such good friends.  I had a whole list of boredom busters to keep them busy this summer but with my kids entertaining each other we hardly touched the list.  But that's the way it should be, isn't it?  Good old fashioned imaginative play, outdoors, and fresh air.

A favorite activity that we did enjoy several times though was making giant bubbles.  After a disappointing morning of swimming lessons being canceled last minute we headed over to the library and were fortunate to catch a show from The Bubble Man.  It's amazing the things you can do with some soapy solution and air.  My kids loved it!  The Bubble Man was nice enough to share his bubble recipe and my kids were anxious to try it.  We created all kinds of bubble wands to try out in our solution but the giant bubbles were definitely a favorite.


Just a couple of dowels, some thin rope, and a washer and we were ready to go.


Big


Bigger


Biggest


 POP!


To make the bubble wands I picked up a bag of dowels at the craft store and screwed an eyelet into the top of each one.


I then tied about an 18 inch piece across the top and then a second longer piece (about 3 feet) as well.  There's also a washer strung through the second piece to weigh it down a bit.  Can you see it at the bottom of the rope hiding in the grass?   The first time I made the bubble wands I used yarn, which worked great . . . until it turned into a big tangled mess.  I decided to invest in some thin rope which worked so much better for avoiding tangles.  Don't worry that much about the length of the rope.  It doesn't matter too much.  Just make sure there's a shorter piece at the top and a longer one underneath.


Here's a few more big ones!


So much fun!


And here's the famous bubble recipe.  Simply mix the three ingredients together and you're ready for some serious bubble fun!  (Glycerin can be found at any pharmacy.  I got ours in the pharmacy section of our local grocery store.)


Have fun!


Monday, July 27, 2015

Healthy Dark Chocolate Fudgesicles


Our summers here are hot, sweaty and sticky.  Yuck!  That's one thing this California raised girl dislikes most about the mid-west -- humidity!  I depend heavily on cool treats to help me get through the hot summers.  These dark chocolate fudgesicles have become one of my favorites.  We make a lot of homemade popsicles and I've found a lot of them turn out icy.  The secret ingredient to keeping these popsicles smooth and soft is gelatin!  It's amazing the difference a little gelatin can make.  Go ahead and give these a try.  I just know you'll the the rich chocolaty flavor and the smooth creamy texture.


Dark Chocolate Fudgesicles
(adapted from this recipe)

1 1/4 cup full fat coconut milk
2 egg yolk
1/2 cup honey
dash of Real Salt
1 1/2 teaspoon unflavored gelatin (I use this kind)
1 teaspoon vanilla extract
2 ounces unsweetened chocolate, roughly chopped

1. Soften the gelatin by placing it in a small bowl with the vanilla.

2. Warm the coconut milk in a pot over medium heat for about 5 minutes, stir occasionally and do not let boil.  Meanwhile mix the egg yolk, honey, and salt in a small bowl.  Slowly poor the hot coconut milk into the egg mixture, mixing continuously to temper the eggs.

3. Pour the mixture back into the pot and continue to cook on medium heat for about five minutes, stirring constantly.  Do not allow the mixture to boil.

4.  Pour the gelatin mixture into the pot and whisk vigorously until the gelatin has dissolved, about two minutes.

5. Remove from heat and stir in the chocolate until melted and smooth.  Let pudding cool at room temperature about 20 minutes and then pour into molds.  Place in freezer for up to six hours or until firm.

Enjoy!


Monday, February 16, 2015

Kid Approved Coconut Lime Gummies


Homemade fruit snacks, or gummies as we like to call them at our house, are a very popular treat.  I've experimented with quite a few recipes over the years but the lemon ones have been a consistent favorite.  That is until we tried these coconut lime gummies. They were a hit with everyone in our home.  Even my pickiest eater loved them.  I love their unique flavor.  Mildly sweet and a little bit tangy. They have just the right subtle combination that we just can't get enough of.


To continue reading and get the recipe visit my food blog Nourishing Bites.


Thursday, March 13, 2014

Celebrating Pi Day


March 14th is Pi day (you know... 3.14?)  So to help you celebrate here are a few fun books about pie you and your little ones can read together.
http://www.amazon.com/Ugly-Pie-Lisa-Wheeler/dp/0152167544

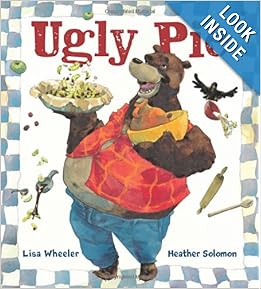
Ugly Pie by Lisa Wheeler
Bear wakes up with a craving for some Ugly Pie.  As he makes the rounds to his neighbors he finds lots of wonderful pies--but no Ugly Pie.  He gathers ingredients along the way and goes home to bake his Ugly Pie--which he generously shares with his neighbors. 


http://www.amazon.com/Pie-Sky-Lois-Ehlert/dp/0152165843/ref=sr_1_2?s=books&ie=UTF8&qid=1394642541&sr=1-2&keywords=pie+in+the+sky

 Pie in the Sky by Lois Ehlert
I always love the illustrations in Lois Ehlert's books.  This story follows a father and son as they watch their cherry tree throughout the seasons--with a delicious ending!


http://www.amazon.com/Enemy-Pie-Reading-Rainbow-book/dp/081182778X

Enemy Pie by Derek Munson
 When a boy moves down the street during the summer he becomes neighborhood enemy number one.  Dad happens to know how to get rid of enemies: with Enemy Pie.  However, the secret ingredient is to spend the entire day playing with the enemy.  Will it work?  Can Enemy Pie turn worst enemies into best friends?


* * * * *


Back in the day when I only had one little boy I entered the local pie contest which was touted as the "biggest pie festival west of the Mississippi." I was so surprised when I won first place for my apple pie!  So in honor of pi day I'm sharing my recipe with you!


Jeanine's Blue Ribbon Apple Pie

Crust:
3 cups flour
1 cup Crisco shortening
1 1/2 teaspoons salt
7-9 Tablespoons ice cold water

Mix flour and salt.  Cut in shortening.  Slowly add the ice water while you mix, until you have dough.  Divide into 2 equal sections (one for the top and one for bottom). Roll out on a floured surface.

Filling:
6 Granny Smith apples, pared, cored and thinly sliced (about 6 cups)
3/4 cup sugar
2 Tablespoons of flour
1/2-1 teaspoon cinnamon
dash of salt
dash of nutmeg

Preheat oven to 450 degrees.  Combine sugar, flour, spices, and salt.  Mix with apples.  (Sometimes I let this mixture set overnight or for a few hours to let the juices come out.)  Line your pie plate with pastry.  Fill with the apple mixture and dot the top with butter.  Adjust the top crust, cutting slits for steam.  Seal the edges and sprinkle the top with sugar.  Bake for 15 minutes.  Lower the over to 400 degrees and cook for about 35 more minutes or until golden brown.


Monday, February 3, 2014

Apple Cake (for the ones you love)


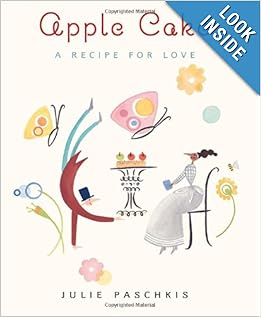
I love just browsing the children's section of the library.  I always find something new and interesting.  A few weeks ago I picked up the book Apple Cake: A Recipe for Love.


I wasn't sure that my boys would really like it but it looked like it might be fun so I picked it up and brought it home.  My 4-year-old loved it and insisted that we read it to his older brothers.  And guess what?  They loved it too!  

Throughout the book love-struck Alfonso is baking a cake to woo his love away from her books.  Will it work?  You'll have to read it to find out!  

At the end of the book you'll find Alfonso's recipe for apple cake which my boys couldn't wait to try out.  It was delicious--and it got gobbled up so fast that I was only able to grab a picture of the very last slice!


Apple Cake

3 small apples
2 TB butter, at room temperature
1 c. sugar
1 egg
1 c. flour
1 tsp. baking powder
1/8 tsp. salt
2 TB sugar
2 tsp. cinnamon

Grease a 9x9 inch baking dish.  Preheat the oven to 350 degrees.

Peel and slice apples into 3/4-inch size pieces and put them in cold water.

In a large bowl, beat together butter and 1 cup sugar until creamy.  Add the egg and beat until it is mixed in.
In another bowl, sift together flour, baking powder and salt.  Add this mixture to the batter and mix well.  The batter will be stiff.

Shake the water off the apples and gently stir them into the batter.  Pour the batter into the prepared baking dish and spread it evenly.

In a small bowl, mix together 2 TB sugar and the cinnamon.  Sprinkle the mixture over the cake batter.
Bake the cake until it pulls away from the pan and the top is golden brown--about 55 minutes.  (The cake will be moist and the topping will be crispy.)  

Let the cake cool for about 10 minutes.  Serve warm with whipped cream or vanilla ice cream.  
(We also ate it for breakfast!)


This would be a fun read (and treat) for Valentine's day!  What are some of your favorite books about love?


Monday, April 29, 2013

New Food Blog and Healthy Fudge Bites


As a mother I want to do the best I can to take care of my children.  One of the ways I feel I do that is to feed my children healthy food.  I've always felt that I've done my best in that area but I also know that what I define as healthy has changed over the years.  I've been on a long food journey and have made gradual changes as I've become more educated on the subject of healthy food and what that really is.  I don't claim to know everything about eating healthy but I do know I have learned a lot of things.  

I think one of the hardest things about making healthy changes in your diet is knowing what to eat instead of the not-so-good-for-you processed stuff.  I'm by no means a gourmet cook (I actually don't really even like to cook) but I have come across some great recipes over the years.  I've been fighting the idea for the last year, but I finally decided to start a food blog to share some of my tried and true favorite recipes.  So if you're ever in a rut and don't know what to make for dinner or a healthy snack or treat I hope you'll stop by and take a look.  

Today I'm posting my healthy fudge bites at my new blog Nourishing Bites.  I'd love for you to stop by. 


Monday, March 25, 2013

Sweet (or Sour) Gummy Hearts


I've seen a lot of recipes floating around online for homemade fruit snacks.  They've peeked my interest and I've been curious if they were any good and if they were worth my time making.  It wasn't until I spied these sour gummy stars at The Mommypotamus that I was finally compelled to make them--like right away.  They just looked so good to eat, and fun.

Not only are they yummy, healthy, and my kids love (seriously love) them, but they take only minutes to make.  


These little treats have become a regular snack at our house.  My kiddos are always willing to help whip up a batch and they are satisfied that they take only about 20 minutes from start to finish (including chill time).


The first several times I made them lemon flavored, but then decided to try orange.  My two older kids love the sweetness of the orange ones, but my one year old and I prefer the tart lemon.


Sweet or Sour Gummy Hearts

2/3 cup fresh squeezed citrus juice (orange juice for sweet gummies or lemon for sour gummies)
6 tablespoons honey
4-5 tablespoons gelatin (preferably grass fed)
3-4 drops food grade orange or lemon oil

1. Combine juice, honey and gelatin in a pan over low heat. Stir until well combined and all gelatin lumps are dissolved.  
2.  Add orange or lemon oil.
3.  Pour mixture into molds and place in the fridge for about 15 minutes.
4. Once firm remove gummies from molds and store in an air tight container.  They will stay firm at room temperature once chilled and can be stored in the fridge for up to two weeks.


I hope you give these little gems a try and enjoy them as much as we have.


Wednesday, February 6, 2013

Valentine's Chex Mix


Amy is always great at coming up with healthy snacks--which I'm grateful for because I always use them!  But here is a little something for your sweet tooth.  I was recently making these for a large group and decided that I wanted a little variety.  This is what I came up with: 


Want to make some of your own?

Here is what you will need:

6 cups Rice Chex cereal
12 oz bag of white chocolate chips
1-2 tsp peppermint extract

optional: 
red sprinkles
valentine m&m's
red candy melts (I just threw in a few with the chocolate chips to give it a pink-ish hue)

Measure your cereal into a large bowl.  Dump your chocolate into a medium sauce pan on low heat.  Stir chocolate occasionally until it is completely melted.  Stir in peppermint extract to taste.  Pour chocolate into cereal, stirring gently until cereal is covered.  Add in any extras (m&m's, sprinkles, etc.)  Spread out on wax paper until cool.  Store in an airtight container.  


Enjoy!