Showing posts with label Healthy Treats. Show all posts

Thursday, April 25, 2019

Healthy No Bake Cookies


No-bake cookies were a favorite of mine as a girl. I wanted to share this childhood favorite with my kids but most no-bake cookie recipes call for a whopping two cups of sugar! This grown up healthier version tweaks the ingredients a tad to make them better for you. Instead of all that sugar these cookies are sweetened with only 1/3 cup honey. I think this recipe tastes just as good as the original except that I feel better feeding it to my family.

We have a peanut allergy in our house so instead of the the traditional peanut butter I use sunflower seed butter and we like them just as much that way. I also like to use a combination of old fashioned oats and quick oats to add some variety to the texture. If you only have one or the other on hand just use what you have and they will still be delicious.


Healthy No-Bake Cookies

Ingredients:

1 cup sunflower seed butter or other nut butter
1/3 cup raw honey
1/4 cup grass fed butter
1/4 cup coconut oil
1 cup semi sweet chocolate chips
1 1/2 cups old-fashioned oats
1 cup quick oats
3 tablespoons cocoa powder

Get the rest of the recipe over at Nourishing Bites.


Monday, September 17, 2018

Pumpkin Banana Muffins (Egg free, Gluten free)


If you're looking for a clean eatin', gluten free, egg free, dairy free, vegan muffin you've come to the right place. These muffins have conquered the impossible. They are so moist and flavorful despite being gluten and egg free.

This is pretty much the only muffin I make these days. This recipe is a great way to use up all my ripe bananas, they're a hit with all my kids, and they're very versatile. To keep things from getting too boring I rotate between adding chopped up apple, mini wild blueberries, and mini chocolate chips to the batter. Even though I use the same base recipe each time my kids feel like they're always getting something new. I do have to note that I am quite opposed to chocolate chips in muffins. The flavor is just wrong to me and I don't think chocolate chips belong in breakfast food. So why I add them to these muffins on occasion is beside me. I guess I love to see the joy on my kids faces when they see chocolate chips in their muffins. I don't know. My favorite way to eat them is without any mix-ins but with pecan pieces sprinkled on top. I'm smart enough to know to only make a few of those per batch though since they aren't very popular with anyone else.

This recipe is quite large, yielding two dozen muffins, so feel free to half it if a smaller batch works better for your family. I like doing a large batch so I can use a whole can of pumpkin without any leftover and I like having some muffins to freeze for a later day.


Pumpkin Banana Muffins
nourishing-bites.blogspot.com

Ingredients:

6 overripe bananas
15 ounce can pumpkin (I like this kind)
2/3 cup coconut oil, softened or melted
1 cup honey or pure maple syrup
3 teaspoons vanilla
4 cups oat flour (I like this kind)
2 teaspoons baking soda
1 1/2 teaspoon baking powder
1 1/2 teaspoon Real Salt
1 teaspoon each: cinnamon, ginger, pumpkin pie spice
Mix-ins of choice (optional): Pecans, peeled and diced apple, wild blueberries, mini chocolate chips


Get the rest of the recipe over at Nourishing Bites.


Wednesday, December 6, 2017

Nourishing Hot Chocolate (Dairy Free, Paleo)


Nothing feels better when you're chilled to the bone on a cold winter day than to drink a nice hot cup of cocoa.  It's amazing how a hot drink can warm you up and make you feel so much better. There are a lot of things I like about this recipe but what I love the most is that it isn't full of sugar. When my kids come in from playing in the snow I hate to hand them mugs of hot chocolate filled with sugar day after day. That's definitely not what their little bodies need to keep them healthy over the long winter. This recipe is sweetened with a little bit of honey so you can fill good about letting your kids drink it all season long.

I also love how rich and creamy this cocoa is and that it keeps me feeling full for hours thanks to a spoonful of grass-fed butter and coconut oil I throw in there. (And in case you've heard the rumors that coconut oil isn't healthy you just *might* have been hoodwinked. I love what this cardiologist says about coconut oil and what this researcher shares about who funded the studies that the American Heart Association based their claims on. Hmmm...)

This recipe is also incredibly flexible. Allergic to eggs? Leave it out. Not a huge fan of dark chocolate? Add less cocoa powder. Don't have any coconut oil on hand? Just double the butter. Do what works for you. Chances are you won't go wrong.


Nourishing Hot Chocolate
nourishing-bites.blogspot.com


Ingredients:

1 cup boiling water
1-2 tablespoons cocoa powder
1 tablespoon coconut oil
1 tablespoon grass-fed butter
1 tablespoon gelatin (I like Vital Proteins)
1 tablespoon honey or pure maple syrup
1 egg (preferably pastured)
small pinch of sea salt (I like Real Salt)


Get the rest of the recipe over at Nourishing Bites. 


Monday, January 2, 2017

Chocolate Gummies


I'll admit.  We're kind of obsessed with gummies at out house. I mean if you saw the shelf stuffed full of silicone molds in my kitchen dedicated solely for the purpose of making gummies your jaw might just drop. I have molds for just about every holiday now, plus everyday any-ol'-occasion molds. There's a lot of them. But they're such a fun snack--the kids love them, they're easy to whip up, and they're oh so good for you.

The health benefits of gelatin are numerous! Did you know gelatin can improve digestion, help maintain healthy bones and joints, help you sleep better, and lifts your mood? And as an added bonus, it nourishes your skin, nails, and hair!

Better pop one more gummy in your mouth! And then pass one out to the kids. They deserve a healthy treat too!


Chocolate Gummies

Ingredients:

1 cup full-fat coconut milk (from a can--not a carton, unless it's this kind--which is my favorite!)
3-4 tablespoons honey or pure maple syrup
3 tablespoons cocoa powder
2 tablespoons grass-fed gelatin
1/2 teaspoon vanilla

Get the rest of the recipe over at Nourishing Bites.


Looking for more yummy gummy recipes? Try these too!


Wednesday, November 2, 2016

Pumpkin Pie Custard


I love custard! Loooove it!

I loved it so much as a girl that when I was just nine years old my mother taught me how to make a simple four ingredient custard using the classic red and white gingham Better Homes and Garden cookbook. I learned pretty quick how to make it all by myself and loved that I could whip up one of my favorite treats all on my own. It's still one of my favorite recipes. Since my nine-year-old baking days I've branched out a little with my custard recipes. One of the favorites around our home now is this Pumpkin Pie Custard. I usually make up a double batch every week. My kids love to eat it as a morning snack and this past summer we found we loved the leftover custard in the fridge for a quick and easy breakfast. I love the pumpkin flavor blended with that classic eggy-custardy flavor. It's the perfect combination

This recipe is easy to whip together, the kids love it, and it's full of good for you ingredients. You really can't go wrong with this one!


Pumpkin Pie Custard
serving-pink-lemonade.com
(adapted from Nourished and Nurtured)

Ingredients:

1/2 cup butter (1 stick), melted and cooled
1 3/4 cup pumpkin puree (if using canned pumpkin this should equal one full can)
1/3 - 1/2 cup honey or pure maple syrup (I stick with 1/3 cup but you can up it for a sweeter taste)
4 eggs
1/2 cup milk kefir, plain whole milk yogurt, or coconut milk (optional)
1/3 cup almond flour (I like Wellbee's for it's fine texture)
2 teaspoons pure vanilla extract
1 teaspoon cinnamon
1/2 teaspoon ground ginger
1/2 teaspoon nutmeg
1/8 teaspoon ground cloves
1/4 teaspoon Real Salt

Get the rest of the recipe over at Nourishing Bites.


Tuesday, June 28, 2016

Take-along Snacks - For the Road


I'm sure we all know how it is when we're traveling . . . we load up on snacks and junk food. This year I'm trying to leave out the junk and have come up with some easy healthy snacks to take along with us on the road.


String cheese -- My kids love the Kraft Twist-ums cheese where you get mozzarella and cheddar twisted together.

Blue Diamond almonds -- We're a peanut free home and that's why we love Blue Diamond almonds. They're one of the few nuts that are completely peanut free. They're also packed full of vitamins and minerals and are high in protein. They make a great salty snack and my kids LOVE 'em.

Dried fruit -- This is what we call "real fruit snacks". Raisins, craisins and apricots are our favorite. I also just bought a pack of dried mangos to try. We'll see how we like them while we're on the road next week.

Bite sized fruit -- Grapes and blueberries are great for the car. They can be popped in your mouth and are mess free--well, depending on who's
eating them . . .

Carrot sticks -- We can't forget the vegetables--and mini carrots are always a popular choice.

Crackers -- I've always loved Annie's Homegrown and we've recently become fans of the new Annie's Snack Mix. The kids love it, and I love that it's all natural and organic. The best part is that it's very affordable too. I stock up on boxes of this stuff when they go on sale at Target for $2. That's a price you can't beat!

Homemade fruit gummies -- These little jello bites are perfect for popping in your mouth. They're sweet and tangy and have a little fat to keep you feeling satisfied. My favorite recipes are these Lemon Gummies and these Coconut Lime Gummies. They're simple enough to make ahead of time and a fun snack to pull out when everyone is in need of a treat.

Granola bar bites -- This is another great snack to make ahead of time (or have the kids make them) to pull out when you're getting the munchies. Find the recipe here

    . . . But you have to have a little junk food too. My kids already know we never go on a trip without licorice. Yum Earth is our favorite brand lately.

    What are your favorite healthy snacks for the road?

    Monday, April 11, 2016

    Healthy Melt in Your Mouth Pumpkin Pie Bars


    I'm always on the search for healthy desserts and nutrient dense snacks that will fill my kids hungry tummies right up.  This recipe fits the bill for both.  These pumpkin bars by themselves make a great snack but by adding a few chocolate chips to the recipe I've tricked my kids into thinking they're now dessert.  Personally my favorite way to eat them is by ditching the chocolate chips and sprinkling a few chopped pecans on instead. Sometimes I will even sprinkle three-fourths of the pan with chocolate chips and the other quarter with pecans so everyone is happy.

    Not only are these pumpkin bars easy to whip together and free of refined sugar but they taste amazing!  They are so moist and light they practically melt in your mouth.  There's no reason to wait until fall to make these dreamy bars.  They are the perfect treat any time of year. 


    Healthy Melt in Your Mouth Pumpkin Pie Bars (GAPS, Paleo, Egg-free, Grain-free


    Pumpkin Pie Bars


    Ingredients:

    3/4 cup creamy almond butter
    1/2 cup pumpkin puree
    1 well-ripened banana (should have lots of brown spots)
    1/4 cup raw honey or pure maple syrup
    1 tablespoon coconut flour
    1 teaspoon pure vanilla extract
    1 teaspoon pumpkin pie spice
    1 teaspoon cinnamon
    1 teaspoon baking soda
    1/4 teaspoon Real Salt
    1/3 cup mini chocolate chips or pecans (optional)


    Get the rest of the recipe over at Nourishing Bites.


    Monday, July 27, 2015

    Healthy Dark Chocolate Fudgesicles


    Our summers here are hot, sweaty and sticky.  Yuck!  That's one thing this California raised girl dislikes most about the mid-west -- humidity!  I depend heavily on cool treats to help me get through the hot summers.  These dark chocolate fudgesicles have become one of my favorites.  We make a lot of homemade popsicles and I've found a lot of them turn out icy.  The secret ingredient to keeping these popsicles smooth and soft is gelatin!  It's amazing the difference a little gelatin can make.  Go ahead and give these a try.  I just know you'll the the rich chocolaty flavor and the smooth creamy texture.


    Dark Chocolate Fudgesicles
    (adapted from this recipe)

    1 1/4 cup full fat coconut milk
    2 egg yolk
    1/2 cup honey
    dash of Real Salt
    1 1/2 teaspoon unflavored gelatin (I use this kind)
    1 teaspoon vanilla extract
    2 ounces unsweetened chocolate, roughly chopped

    1. Soften the gelatin by placing it in a small bowl with the vanilla.

    2. Warm the coconut milk in a pot over medium heat for about 5 minutes, stir occasionally and do not let boil.  Meanwhile mix the egg yolk, honey, and salt in a small bowl.  Slowly poor the hot coconut milk into the egg mixture, mixing continuously to temper the eggs.

    3. Pour the mixture back into the pot and continue to cook on medium heat for about five minutes, stirring constantly.  Do not allow the mixture to boil.

    4.  Pour the gelatin mixture into the pot and whisk vigorously until the gelatin has dissolved, about two minutes.

    5. Remove from heat and stir in the chocolate until melted and smooth.  Let pudding cool at room temperature about 20 minutes and then pour into molds.  Place in freezer for up to six hours or until firm.

    Enjoy!


    Thursday, February 26, 2015

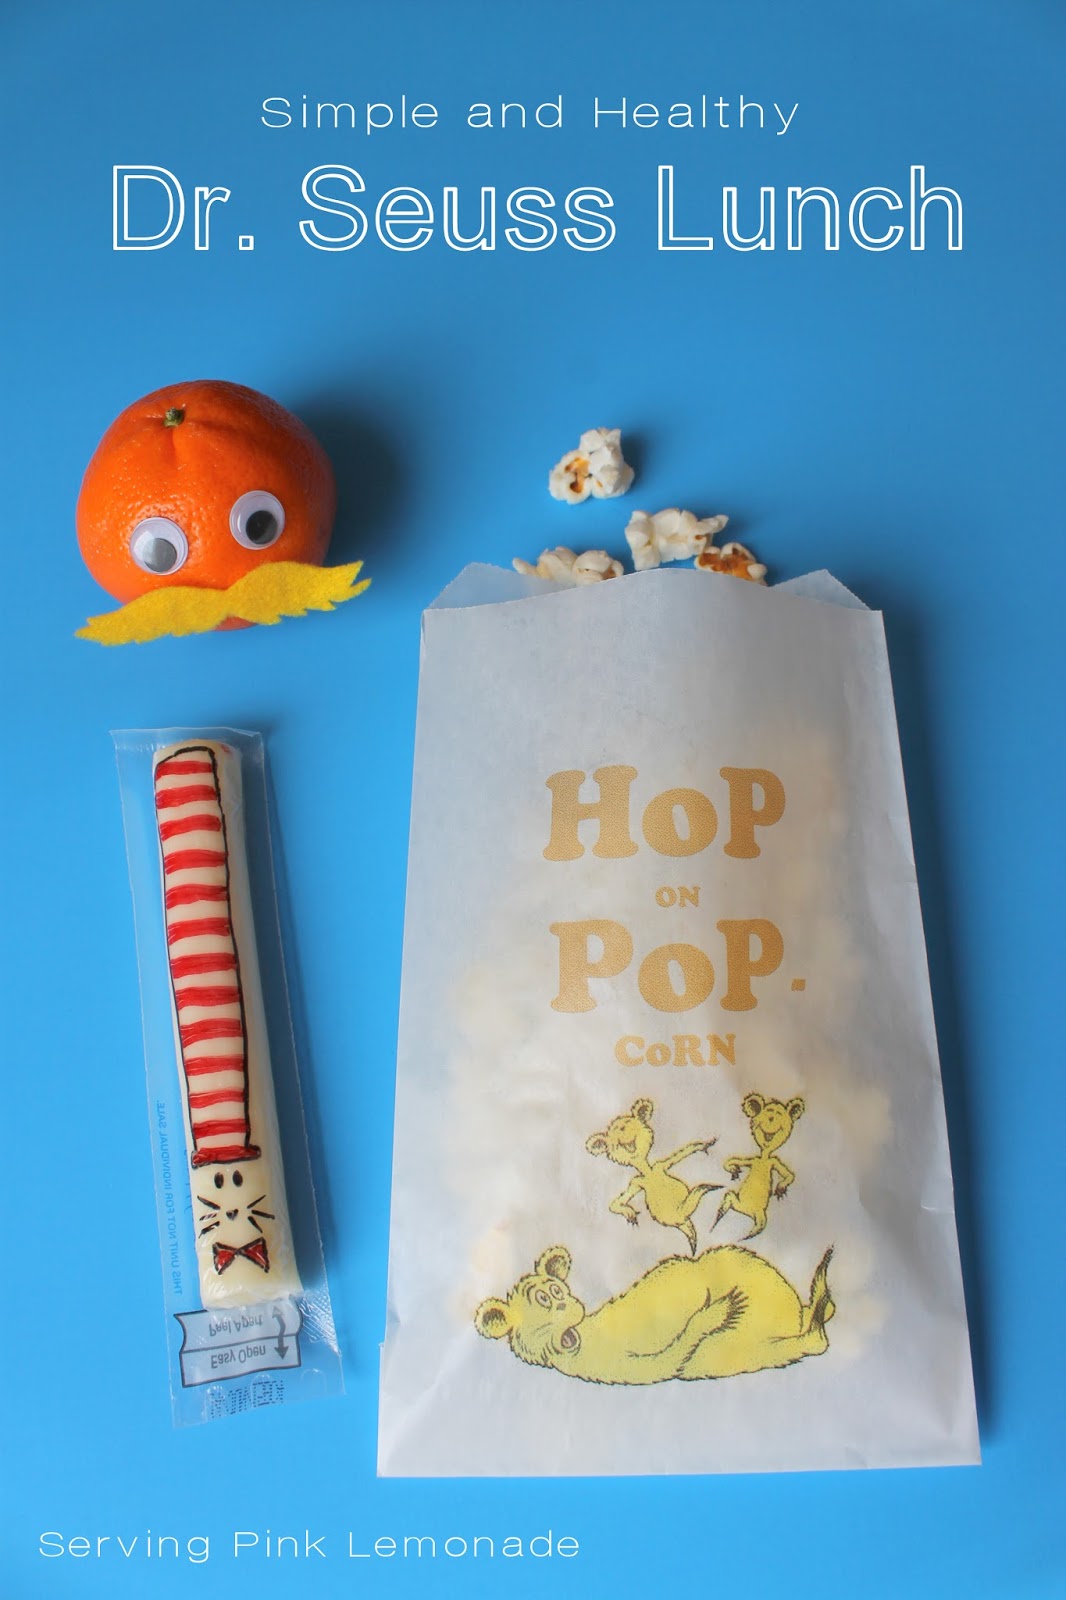
    Simple and Healthy Dr. Seuss Lunch


    Dr. Seuss and his books are much loved in our home.  We've made it a family tradition to celebrate his birthday on March 2nd each year.  I find celebrating Dr. Seuss is a fun and magical part of childhood.  My kids won't be little forever and this is a simple way to make it memorable. (To see how we've celebrated in years past click here.)
    This year I came up with a simple lunch to surprise my kids with in their school lunch boxes on Monday.

    Simple and Healthy Dr. Seuss Lunch


    To make these Cat in the Hat string cheeses I simply used a black and red sharpie marker and drew right on the plastic wrapper.
    Simple and Healthy Dr. Seuss Lunch.  Cat in the Hat Cheese Stick.


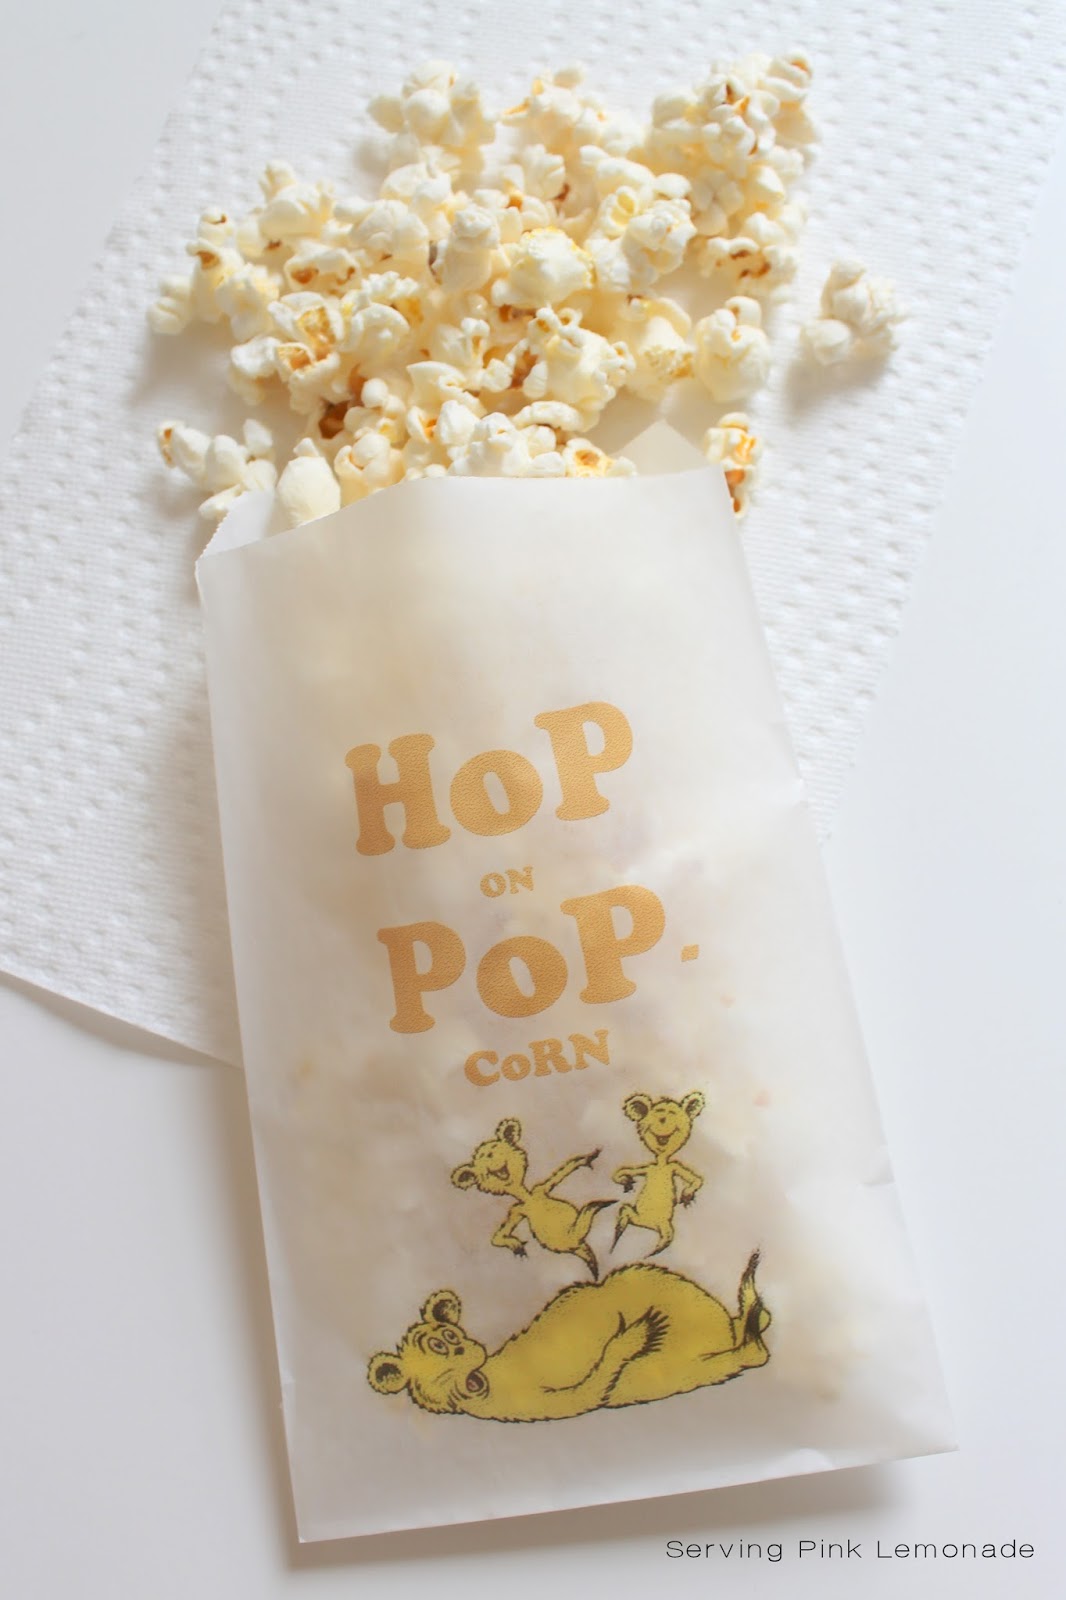
    For these "hop on pop-corn" bags I put together this little printable and printed them off onto wax paper bags that I have left over from another project.  (Find printable image at end of post.)
    Simple and Healthy Dr. Seuss Lunch.


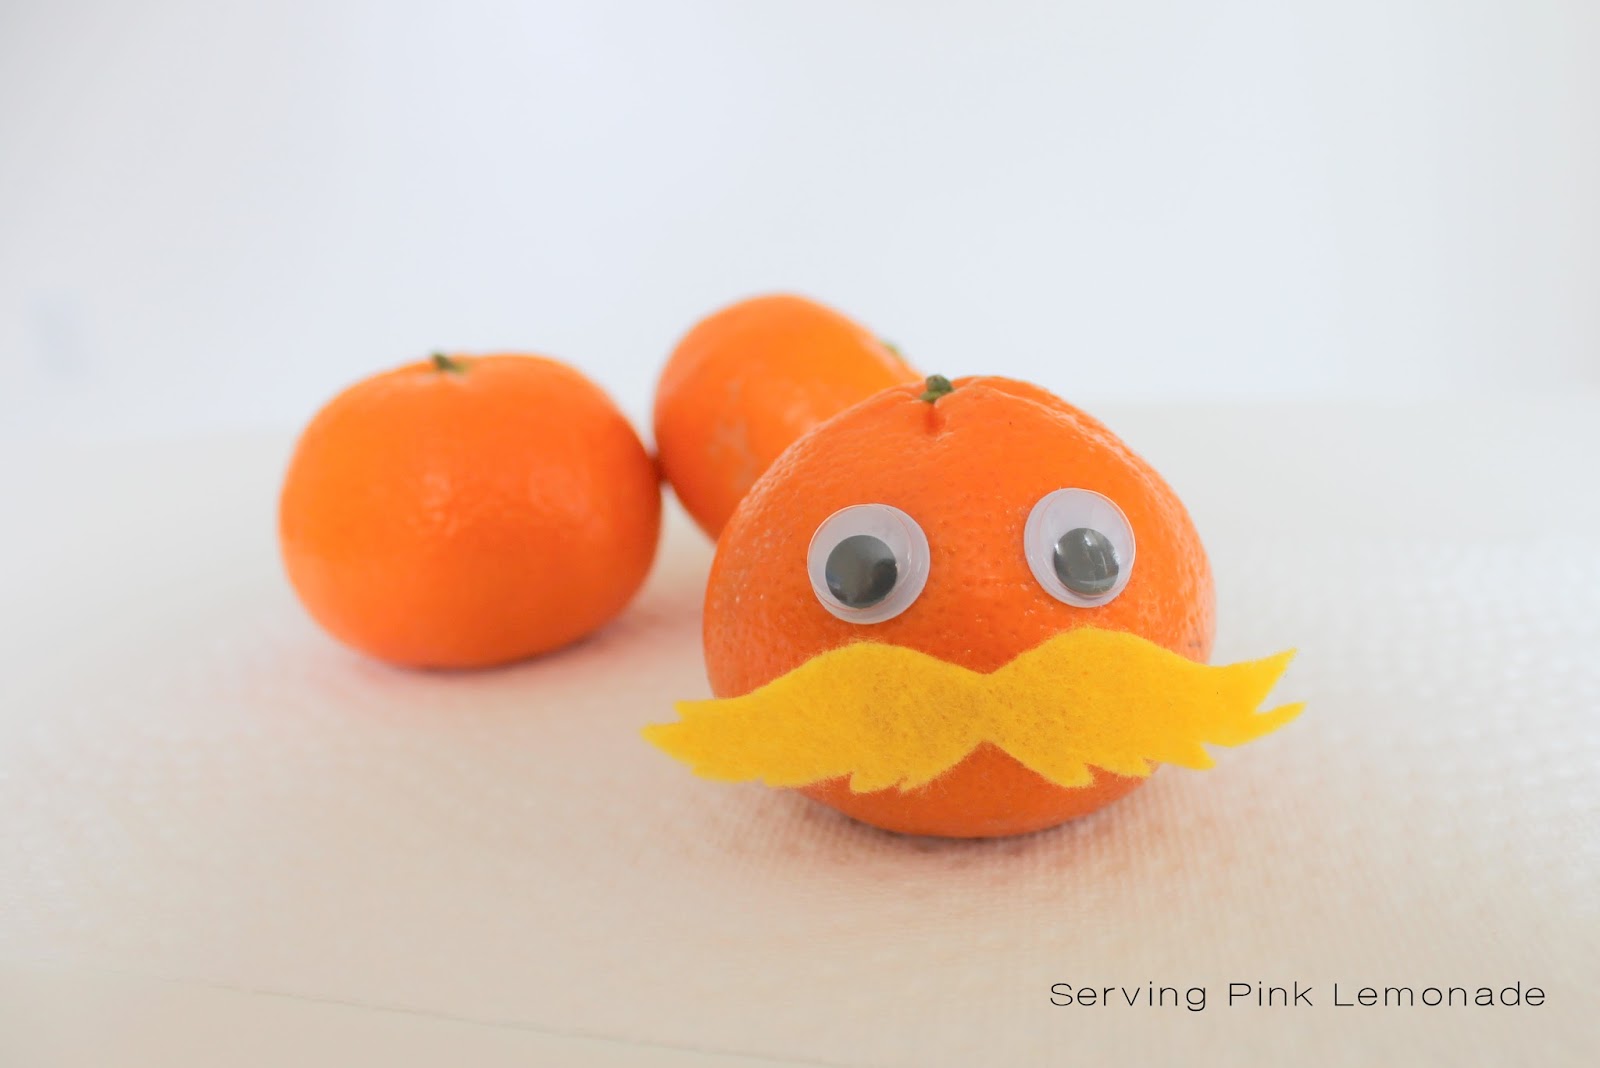
     This cutie Lorax came together quickly with two googly eyes and a felt mustache. 
    Simple and Healthy Dr. Seuss Lunch. The Lorax Orange.


    I can't wait to pack my kids lunch on Monday.  I hope they get as much of a kick out of their Dr. Seuss lunch as I had making it.
    Simple and Healthy Dr. Seuss Lunch.


    Monday, February 16, 2015

    Kid Approved Coconut Lime Gummies


    Homemade fruit snacks, or gummies as we like to call them at our house, are a very popular treat.  I've experimented with quite a few recipes over the years but the lemon ones have been a consistent favorite.  That is until we tried these coconut lime gummies. They were a hit with everyone in our home.  Even my pickiest eater loved them.  I love their unique flavor.  Mildly sweet and a little bit tangy. They have just the right subtle combination that we just can't get enough of.


    To continue reading and get the recipe visit my food blog Nourishing Bites.


    Monday, April 29, 2013

    New Food Blog and Healthy Fudge Bites


    As a mother I want to do the best I can to take care of my children.  One of the ways I feel I do that is to feed my children healthy food.  I've always felt that I've done my best in that area but I also know that what I define as healthy has changed over the years.  I've been on a long food journey and have made gradual changes as I've become more educated on the subject of healthy food and what that really is.  I don't claim to know everything about eating healthy but I do know I have learned a lot of things.  

    I think one of the hardest things about making healthy changes in your diet is knowing what to eat instead of the not-so-good-for-you processed stuff.  I'm by no means a gourmet cook (I actually don't really even like to cook) but I have come across some great recipes over the years.  I've been fighting the idea for the last year, but I finally decided to start a food blog to share some of my tried and true favorite recipes.  So if you're ever in a rut and don't know what to make for dinner or a healthy snack or treat I hope you'll stop by and take a look.  

    Today I'm posting my healthy fudge bites at my new blog Nourishing Bites.  I'd love for you to stop by. 


    Monday, March 25, 2013

    Sweet (or Sour) Gummy Hearts


    I've seen a lot of recipes floating around online for homemade fruit snacks.  They've peeked my interest and I've been curious if they were any good and if they were worth my time making.  It wasn't until I spied these sour gummy stars at The Mommypotamus that I was finally compelled to make them--like right away.  They just looked so good to eat, and fun.

    Not only are they yummy, healthy, and my kids love (seriously love) them, but they take only minutes to make.  


    These little treats have become a regular snack at our house.  My kiddos are always willing to help whip up a batch and they are satisfied that they take only about 20 minutes from start to finish (including chill time).


    The first several times I made them lemon flavored, but then decided to try orange.  My two older kids love the sweetness of the orange ones, but my one year old and I prefer the tart lemon.


    Sweet or Sour Gummy Hearts

    2/3 cup fresh squeezed citrus juice (orange juice for sweet gummies or lemon for sour gummies)
    6 tablespoons honey
    4-5 tablespoons gelatin (preferably grass fed)
    3-4 drops food grade orange or lemon oil

    1. Combine juice, honey and gelatin in a pan over low heat. Stir until well combined and all gelatin lumps are dissolved.  
    2.  Add orange or lemon oil.
    3.  Pour mixture into molds and place in the fridge for about 15 minutes.
    4. Once firm remove gummies from molds and store in an air tight container.  They will stay firm at room temperature once chilled and can be stored in the fridge for up to two weeks.


    I hope you give these little gems a try and enjoy them as much as we have.


    Wednesday, February 27, 2013

    Rainbow Fruit Kabobs


    Last year for St. Patrick's day my kids helped me put together these rainbow fruit kabobs as a treat to celebrate.
    Don't they look delicious?  And festive?  I love all the beautiful colors together.


    My kids of course loved eating them.  We didn't have any frosting covered cookies, or green pudding, or chocolate coins.  We ate fruit, and it was special.  I love that healthy can still be a treat.  Sometimes I forget that simple is better.  I don't have to fill my kids up with candy or sugar for every little occasion. We had fun creating our kabobs together and eating each sweet juicy bite together.  I think we started a great St. Patrick's Day tradition that we'll keep.

    Interested in more healthy treat ideas?  See some of our ideas HERE.


    Monday, February 4, 2013

    Healthy Valentine Treat


    Last year I helped my daughter throw a little Valentine party for some of her friends similar to the one we did two years ago.  This time we were trying to keep the sugary sweets to a minimum so we made these fruit kabobs for a healthy snack.


    They were easy to make and were a big hit with the girls.  I'll for sure be making them again this year for my family.


    Monday, January 28, 2013

    Lunch Box Notes


    I love to add little notes to my boys' lunches.  Sometimes they are on a napkin.  Occasionally I'll find printables of jokes that I'll throw in there.  But perhaps my favorite is the banana.


    I found this idea online a few years ago.  All you need is a banana and a toothpick.  In the morning while I pack the boys' lunches I scratch a note into the side of a banana with the toothpick.  You don't even have to break the skin--just hard enough to make a slight indentation.  By lunchtime the note has turned nice and dark for the boys to easily read.  

    It's such a fun way to send a little love to my boys during the day.  Do you have any fun ways to send love to your kids while they are gone all day?

    Monday, November 5, 2012

    Homemade Crunchy Caramel Popcorn (using only unrefined sweeteners)


    Every autumn around Halloween my mom made caramel popcorn when I was growing up.  I love this stuff.  I made it myself the first few years my husband and I were married, but since our kids came along there always seems to be so many sweets this time of year to add one more thing.  This year though I broke down and made some.  My daughter informed me that she would not like it but after convincing her to take one bite she was hooked and we sat there together and ate half the bag between the two of us.  Oops! 

     Some people like their caramel corn soft and chewy, but I like my crunchy.  I adapted my recipe from Kimi's over at The Nourishing Gourmet.  I love that she uses no refined sweeteners and I also love that it tastes just like the stuff I ate growing up.

    Be careful.  This stuff is seriously addictive.


    Crunchy Caramel Popcorn

    3/4 cup popcorn kernels, popped
    1/2 cup butter
    1 cup sucanat
    1/4 cup honey

    1/2 teaspoon baking soda
    1 teaspoon vanilla

    Preheat oven to 250 degrees. Melt the butter, sucanat, and honey in a small pot.  Bring to a boil and simmer for five minutes, stirring regularly.  Meanwhile, place the popcorn in a large bowl with plenty of room to stir (you may need to use two bowls).  Once the mixture has simmered for the allotted time add baking soda and vanilla.  Mixture will become foamy.  Remove from heat and pour over popcorn.  Stir until well coated.  Place popcorn onto two jelly roll pans in a single layer.  Place in preheated oven for 40-50 minutes.  Caramel will harden completely once cool.  Remove from pan and place in air tight container.  Enjoy!


    Thursday, October 25, 2012

    Roasted Seeds


    I love roasting pumpkin seeds every fall.  My mom roasted them when I was growing up so I feel like it's a tradition.  I could eat them year round, but the two pumpkins we buy every year never seem to have enough seeds to last us very long.

    Last year when my mom came to help after baby #3 was born she made some delicious acorn squash with apples for dinner.  She saved the seeds from the squash and roasted them up.  They were so yummy and I couldn't believe I never thought of doing that.  I always threw the seeds away.  Now they're a favorite snack at our house.  My kids always groan when they see I'm making squash for dinner but they get super excited when they see me roasting up the seeds for a snack.  Those tasty little seeds are gobbled up quick at this house.


    Roasted Pumpkin or Squash Seeds

    1 cup squash or pumpkin seeds
    1 tablespoon butter, melted
    1/4 teaspoon Worcestershire sauce
    1/8 teaspoon salt
    1/8 teaspoon onion powder

    Rinse seeds in cold water and make sure all the the pulp and strings are removed.  Drain and pat dry.  Stir seeds in a bowl with remaining ingredients making sure they are fully coated.  Place seeds in a single layer on a baking tray (I like to place parchment paper underneath for easy clean up).  Bake in a 250 degree oven for about 30 minutes or until brown and crispy (pumpkin seeds may take an extra 15-20 minutes).

    Enjoy!


    Monday, October 22, 2012

    Healthy Halloween Snack


    With all the candy that comes with the month of October, how about a healthy Halloween snack?  I think we need some of those too.

    The other day I picked up some mandarin orange cups from the store . . .


    and with some inspiration from Aimee I created these festive little orange jack-o-lantern snacks.  
    Aren't they cute?


    A sharpie marker is perfect for drawing on the little faces.  I'll be serving these for lunch on Halloween next week.  I think my kids will love them.

    Another idea is to draw a little face right on the peel of an orange or clementine like Ann did here.  Great idea!


    So, are you ready for Halloween?  Costumes all done?  Or are you still finding time to squeeze in the finishing touches?