Showing posts with label Home Decor. Show all posts

Tuesday, August 14, 2018

Felt Flower Wall Art


Over the summer we rearranged rooms at our house.  Since that time I've been wanting to hang some pictures up on the big empty wall above my daughter's bed.  I had a few pieces I knew I wanted but I needed more to fill out the space.  I searched so many stores for something that caught my eye.  I wanted some sort of flower that popped off the wall.  I just couldn't find anything I loved.  I moved on to scouring Pinterest and decided that I could make some flowers.  I love the huge paper flowers but knowing that they would be within reach of my kids I decided against that idea.  Instead, I settled on felt flowers.  


I found some great tutorials here.  All were fairly simple and only required felt and hot glue!  When I was done making my flowers I spray painted a piece of cardboard to stick in my empty frame.  After deciding on an arrangement for my flowers I hot-glued them to my cardboard.


I am so happy with how my felt flower arrangement turned out and my daughter just adores them up on her wall!


Tuesday, October 3, 2017

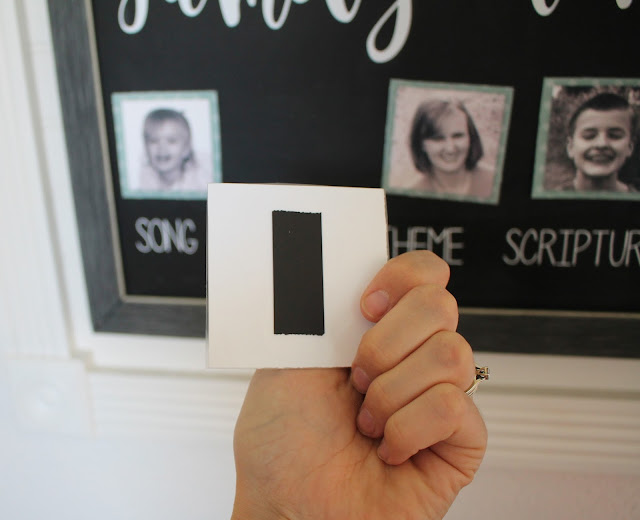
Family Home Evening Board


Since my daughter's birth nearly 3 years ago I've needed to update my Family Home Evening board.  My boys have been nagging me to do it for years.  Now that she is old enough to participate and wants to be included I figured I should finally get it done.  After pondering about it for a long time I finally figured out what I wanted to do. 


I scoured the stores for a magnet board just the right size for my space.  Target, Hobby Lobby, Michael's, Walmart . . . you name it, I looked there.  Finally, I found what I needed on Amazon. I checked and double-checked in the description and the questions to make sure the board was the right size. (I really hate returning stuff!)

 I then designed the board with my Silhouette software.  The fonts I used were Magnolia Sky (one of my favorites right now!) and Penelope Anne.

After applying the vinyl to my board (the small lettering was so hard . . . so if you're planning to using that font don't say I didn't warn you!) I printed up some recent pictures of our family all in black and white.  I mounted and laminated them and after cutting them out I applied some magnetic tape to the back.  I bought my magnetic tape at Hobby Lobby but you can find it on Amazon as well.


I'm so happy with my new board and my kids are thrilled to have updated pictures!


Tuesday, September 26, 2017

$3 Silhouette Art Switch Up


A few years ago I shared the silhouette pictures I hung up in my daughters nursery. Now with a baby boy on the way I decided to keep things simple with the nursery and switch out all the pink for blue. The nursery was already pretty neutral so my decor change just required a new crib sheet, curtains, and silhouette art.


I love these frames. I originally bought them from the dollar store and I have really gotten my money's worth out of them.


For the art I did some google searching on the internet to find silhouette images I liked and then printed them off onto card stock. Easy-peasy!


I also found the perfect spot to hang this "Day in the Life of a Little Boy" picture by Norman Rockwell that my sister gifted to me years ago. I was glad to have an excuse to hang it up again because I think it's so cute.


I love how this room has come together. Super simple without too much fluff. Just the way I like it!


Now that the nursery is ready we're just waiting on baby boy to arrive. Hopefully any day now!


Monday, April 10, 2017

My Gospel Standards


I like to hang things on the walls of my home that have significance and so I have been looking for years for a cute version of My Gospel Standards.  I love the standards that are laid out and wanted a daily reminder hanging up so my children could see it, but I also wanted something that matched my style.  I searched all over Etsy and Pinterest but could never find something that I loved.  And so I took matters into my own hands and created something for myself.


 If you would like to print this you can click on the image and then right click to save it.  This is sized to be a 16x20 poster which I then printed at Costco.


I love these reminders hanging in my loft now!  If you use this image I'd love to see what you do with it!  You can tag us on instagram @servingpinklemonade.  Enjoy!


Monday, September 12, 2016

IKEA Hack: DIY Jewelry Organizer


My necklaces have been collecting for a while now on a hanger in my closet.  I place my smaller pieces of jewelry in my jewelry box on my dresser but my chunky long necklaces don't fit--so on a hanger in the closet they go. As the months (and years!) have gone by they've become a tangled mess.  I finally realized enough was enough and decided I needed a more organized solution for them. This jewelry holder is the results of my frustration.  It has plenty of hooks for all my necklaces and room for more.  I have it hanging on the wall in my bathroom so I can access them easily.


To make my jewelry holder I picked up this 20 x 20 RIBBA frame from IKEA.  It was very practically priced at only $15!


For a few dollars I got these 7/8 inch white hooks from Lowes.


I removed the backing and glass from the frame and marked where I wanted my hooks to go.  After my sweet husband saw me working to screw the hooks in for a few minutes, and realizing it was going to take me forever, he got out his drill and finished the job for me.  


All lined up in a row--nice and secure.


I then glued some fabric to the back of the frame using modge-podge. I spent way too long deciding on what pattern of fabric to use but in the end I went for the subtle white stripes. I decided a simple pattern was better since once I had all my necklaces hanging there would be a lot going on with colors and shapes.


All done and ready to hold some jewlery! I just love having my necklaces organized so prettily! 


Monday, June 9, 2014

Big Floor Pillows--Tutorial


Be sure to stop by Cut Out and Keep this week.  They're featuring my book Quiet Book Patterns as the book of the week!  You'll find my author interview, a free sample project (along with template), and you can also enter to win a copy of my book.  Find it all here.  -Amy
. . . . . . . . . . . . . . . . . . . . . . . . . . . . . . . . . . . . . . . . . . . . . . . . . . . . . . . . . . . . . . . . .


I needed a little something more to add to our reading nook to make it extra cozy.  I decided that some big floor pillows would do just the trick.  I had originally made some giant floor pillows (which I spied on Pinterest) for the boys to lay down on while watching movies but I needed something a little smaller.

I had a lot of fun picking out some happy-looking fabrics for this little corner of our home.  I first cut out some 20x20 squares and 4 strips that measured 5x20.


I then took one of my large squares and laid the strips along the edges, right sides together, pinning them in place.


Since the corners overlap when lying flat you'll have to lift them up and pin them together.


I sewed three of the corners together first.  You'll want to keep one open for later.


Then I sewed the contrasting edges together.


I found the trickiest part to be taking this piece and pinning the top square to the edges of the strips. 


Once that is sewn then turn it right side out and use that one corner that wasn't sewn shut to stuff the pillow with batting.  Enlist some help--your kids will think it's fun!  Plus, it takes lots and lots of batting!


When it's stuffed to the firmness that you like you can hand stitch the last corner shut and--viola!  You have a great floor pillow!


These floor pillows were the perfect addition to make our reading nook a cozy place to cuddle up and read.


Monday, June 2, 2014

Cozy Reading Nook


I mentioned in a previous post that we left a beautiful Southern home last summer to reside in the desert.  One of my favorite little corners of our old home was the reading nook I created. We had a small loft that was the perfect size.  


Plus there was great natural light--perfect for reading.  It was colorful and inviting with lots of big, comfy pillows.


We had a basket for comic books, a special place for our little Beatrix Potter collection, and . . .
https://blogger.googleusercontent.com/img/b/R29vZ2xl/AVvXsEhx8tknv6G3vKdpGo3WgEsFhBqei7l4V5hgJfNLxDwqXSPAt7tJBCfq-EuiRUY_ijr1xTxW4_QXwvf6Sb4Te0zPwBjvrFR0ScmXs6_s9Wfs_iEr4aEHyNYMUaKAhWhgsNbehpLl50viQn2N/s1600/016.JPG

 
a bin of board books for baby H to grab.
https://blogger.googleusercontent.com/img/b/R29vZ2xl/AVvXsEj0CYokTwdtPenzfk_PHSgg-Uy4BqglGfVvKD8sqY45ob3lFuRXB6F81T83C6AXtEZgDl8e3HBGZ9NHZcGNGUiOxCL7Fe4XSQTI3Hla4ZUmUQZ6ZELcq6C8AL5ecfBUjt55Y612vJP00V8D/s1600/022.JPG


Perhaps my very favorite part were these framed children's book illustrations.  Each one of them represents the name of one of my boys.
 https://blogger.googleusercontent.com/img/b/R29vZ2xl/AVvXsEgLJNXnHyPyn7d5stTRgqhI7fchMxQM7GamNNr-j6A3B7IJu_HZo0nEJuhVXUG_o2iz5QR3SI61wqUOYGuzYoSdmKmZKFn2DGrGJIoDyi05viu-kJPP8oCYfMXs5GMh9oaRkxwkAkC-hQED/s1600/020.JPG


There are so many things I miss about our old house but this little corner tops the list.


Tuesday, May 27, 2014

Family History Wall


A few years ago the seedling of an idea began to grow in my mind.  I wanted to create a space in our home featuring our family history.  After years of planning and collecting--and altering plans because of moves--my plans are coming to life.  It's not in its final form by any means.  I still would like to collect pictures to add--but it's a start.


Here are some of the items I've hung so far:

Engagement photos of my parents and my in-laws
Four generation photo of me when I was a baby
Handkerchief which belonged to my great grandma
 

Teething ring that belonged to my husband's uncle who died as a child


State of Oklahoma (where we lived for 9 years)-- I bought the shape and cut it with my Silhouette

 
Watercolor map of our town in North Carolina--done on this great site


Scripture--Joshua 24:15
Picture of an LDS temple
Family Tree (cut from my Silhouette)
Copy of a list of family goals written by my grandparents years ago-- 4 things we will do daily, weekly, monthly and yearly


4 blank frames . . . which I will eventually add silhouettes of my boys (using this method)


I love how this all came together and I am excited to add to it--hopefully some wedding/engagement photos of our grandparents.  Because we believe that families can be linked together forever I want my boys to know where they came from.  This is just one small step I've made to share that with them.  

What do you do to share your family history with your children and others?